Showing posts with label Biodegradable waste. Show all posts

Wednesday, December 31, 2014

A Review of the Steps to Successful Composting

The hot composting method (also known as fast or active composting) is the most common as it yields desired results relatively quickly.  It is also the best method to take care of unwanted weeds as it will destroy the seeds during the heat phase.

After you have picked a level site for your composting bin, you will need a good base for the bottom made of leaves and high-quality soil.  The leaves should be chopped or chipped so that no one piece is larger than two-three inches (this is a good rule of thumb for all materials added to the bin).

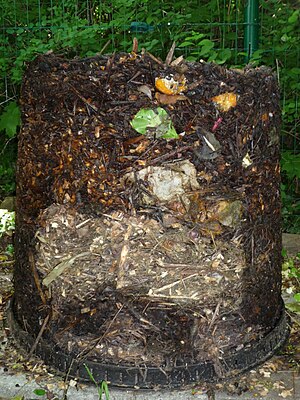
English: Materials in a compost bin.
Materials in a compost bin. (Photo credit: Wikipedia)
Once your bin and base are in place you can start to add your green food (nitrogen-rich) and your brown food (carbon-rich).  The ratio that should be roughly followed is one part green for every two parts brown.

Monitor the pile every other day for moisture control and temperature.  During this time you need to rotate or turn the pile to get good air flow inside the pile and to help with odors. 

Once your pile is full or has finished the heat phase, let it cure.  The length of curing will depend on your intended use of the finished product.  To eliminate any larger pieces of organic matter that did not break down use a screen to sift them out.  But if you follow the rule of not putting in anything that is larger than three inches this should not happen too often.

A compost humus can be ready to use in as little as 4-6 weeks in a warm climate with a hot composting method and maintenance to the pile on a regular schedule.  If you are going to use the cold (or inactive) method of composting, it can take up to one year for usable compost to be ready.

Hopefully you've gained some useful tips to help you get started with composting! Be sure to stay tuned to this blog for more helpful compost and gardening tips in 2015!


Tuesday, August 28, 2012

The Basics of Vermiculture (Worm Composting)

If you're an organic gardener, you're probably quite familiar with composting. But you may not have heard as much about vermiculture. What is vermiculture?  It is quite simply, composting with worms.  Composting is the practice of breaking down organic matter to create natural fertilizer.  It’s great for gardening and a very sustainable practice.  Vermiculture facilitates the composting using the natural decomposition abilities of worms.  It uses a worm’s natural abilities to make great fertilizer out of organic waste.

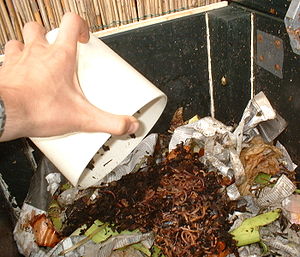
English: Composting-worms just added to a fres...
Composting-worms just added to a fresh batch of garbage in a self-made worm-bin. (Photo credit: Wikipedia)
What Types of Worms Can Be Used in Vermiculture

Not all worms are good for a home composting set-up.  In fact, some types of worms can't be used for any type of composting system.  However, a handful of worm varieties do make great organic composting partners.  They include:

* Red wigglers
* European night crawlers
* Belgian night crawlers
* Blueworms

Of all of these types of earthworms, the red wigglers are the most common worms used in vermiculture.  All worm types can be found in your local nursery, live bait shop, and of course ordered online - because who doesn’t want to receive a box of worms in their mailbox!  :-)

What Do Worms Eat?

Not everything can be composted.  However, vermiculture does lend itself to more options than standard composting.  Worms can eat:

* Fruit and their peels
* Vegetables and their peels
* Pulverized egg shells
* Tea bags
* Coffee grounds

They can also eat meat and dairy products, oily foods, and grains.  However, these items tend to smell something awful and most people don’t recommend composting them.

Materials To Compost With Worms At Home
English: The inside of a worm composting bin, ...
The inside of a worm composting bin, after the worms have eaten many kitchen scraps. Note the castings on the sides of the bin. (Photo credit: Wikipedia)
It’s actually very easy to set up a worm composting system in your home.  To get started you’ll need:

* A bin – a wash bin or commercial worm bin are both great options.  It doesn’t need to be deep because the worms like to hang out near the surface.  If you’re using a wash bin, you’ll want to drill holes in the bottom for drainage.  You’ll also want a cover for your bin.

* Bedding – newspaper works the best because it’s easy to access.  Shred it and dampen it before placing it in your bin.  Add a few handfuls of soil and you’re ready to add the wigglers.

* Worms

* Food to compost – the ratio is one pound of food waste per day to two pounds of worms.  If you have fewer worms, reduce the food waste accordingly.

Place your worm bin in a room with moderate temperatures that is easy enough to access.  Options might include your kitchen, basement, outside the back door or in your laundry room.  When your compost is ready, it will resemble a dark, rich soil.  You can use it in your garden or place around houseplants. 

Be sure to check back Thursday when we will share some tips for making sure your worm composting venture is a success!  Or check out the very helpful book Worms Eat My Garbage: How to Set Up and Maintain a Worm Composting System.


Enhanced by Zemanta

Thursday, May 17, 2012

Store-Bought Fertilizer Versus Home-Made Compost

You may wonder what the different benefits are between fertilizer purchased from the store and compost humus that you make at home.  The aim of both is the same - to improve the quality of your garden, lawn, and soil - but there are differences too.

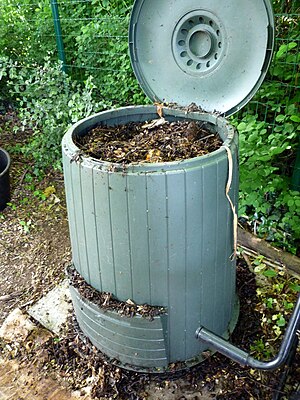
A green compost bin.
A green compost bin. (Photo credit: Wikipedia)
Many fertilizers that you purchase at your garden center contain artificial or toxic elements to make your lawn and garden look nice – but not necessarily healthier. The benefit of this type of fertilization is the ability to purchase a mix that meets the needs of your specific lawn or garden.  If your lawn is too dry, patchy, or has a lot of weeds – if your garden is weedy or plagued by pests - there is a product available that can target each problem (be aware that a pesticide is part of this solution).  If you are using a commercial mix in your garden, read all labels carefully to ensure the product is safe to use around vegetation that is going to be consumed. If it's not approved for organic gardening, you really don't want it in your food!

In contrast, when you use compost humus as a fertilizer there isn’t a lot you can do to customize the end result.  But the good thing is, you don’t really need to.  Mature compost is a process that occurs naturally, and a well-composed compost contains a wide variety of minerals and nutrients to support a wide spectrum of plant growth.  The compost contains a wide range of benefits for your garden or lawn that do not involve chemicals.

Organic compost Sherfield on Loddon garden centre.
Organic compost for sale. (Photo credit: Wikipedia)
It will really depend on your personal preference, and your style of gardening, whether or not you use commercial fertilizer or compost.  If you like the idea of gardening organically and using compost but not the idea of making it yourself you can purchase the compost from some gardening centers, or even online.  Also contact your city’s recycling department, as they may have a program set-up that allows residents to donate food and other organic waste for composting and then share in the mature compost when it is ready.

Enhanced by Zemanta

Tuesday, May 15, 2012

Composting Methods & Bacteria

The most common way to compost organic material into usable fertilizer is to make use of naturally occurring microbes to use the material as food and energy.  Other than ensuring your pile has enough water, food, and air, you can leave the rest of the job to the ever-helpful fungi and bacteria. 

Freshly bedded worm bin, garden waste mixed wi...
Freshly bedded worm bin, garden waste mixed with finished aerobic compost (Photo credit: Wikipedia)
The types of microbes you want to inhabit your composter are aerobic, meaning they need oxygen to thrive and live.  You can make sure they have enough air by aerating the compost heap (turning it over with a rake or fork) - or use a compost tumbler which is easily turned.  Another way to ensure there is good air circulation is to add a material such as wood chips or straw – both are bulky and are not easily compressed.  This makes sure the air can get in and do its job.

The other kind of microbes that can convert your waste are anaerobic (they do not need oxygen to survive).  This may sound like a great alternative – not having to worry if enough air is available.  But the unpleasant side effect of having anaerobic microbes in your compost bin is smell.  Without enough air, there will be a distinct rotting garbage smell emanating from your bin. 

Another way to compost is to use red worms to help decompose the organic waste.  This form of composting is known as vermicomposting or vermiposting. The red earthworms can quickly turn your table scraps into compost.  To help the process along it is recommended that you chop or cut the organic material you add to the composter first.  This is an optional step but will yield faster results.  Only food scraps, paper or yard waste is recommended for this type of composting.  You can purchase red worms at your local pet or fishing supply store.

A number of different composters are available for either type of composting. A few examples are below.

   
Enhanced by Zemanta

Saturday, September 24, 2011

Good Foods for your Compost Bin

There are some rules to learn and follow about what you can put into your compost bin in order to keep your pile healthy and working properly.  The most common organic material that you will add to your compost will be kitchen scraps.  Kitchen scraps are considered "Green" food as they contain nitrogen – an essential element to the process. (See Thursday's post for more on Green and Brown components.)

Compost BinImage via WikipediaIt is a good idea to have a container with an airtight lid to store the food waste in your kitchen.  You do not want to attract insects or pests inside your home nor do you want to be running to your compost bin every time you make a meal or snack.  If your kitchen container is airtight you will also cut down on unpleasant odors.

Here is a list of the most common compostable items from the kitchen:

*    Vegetable peels and seeds
*    Fruit peels, cores, and seeds
*    Coffee grounds – you can compost the paper filter too
*    Tea bags or loose tea leaves
*    Crushed egg shells – do not add left-over eggs cooked or raw
*    Breads

Compost from Compost BinImage via WikipediaYou may be tempted to add other food scraps into the bin, but don’t.  You should not add any animal meat or bones, oily products, or fish remains - not only will these be sure to attract unwanted pests but they will make your compost smell bad.  Whenever you are adding your green food to the compost bin, make sure you cover it under a thick layer of "Brown food" (yard waste or other carbon producing agent such as dry leaves, wood chips, sawdust, or small twigs).

If your food scraps are very wet or moist, in addition to putting brown food on top of the scraps mix some in with the waste too.  This will enable better air circulation throughout your pile.
Enhanced by Zemanta