Tuesday, January 31, 2012

Considering Part-Time Indoor Gardening?

What is a part-time indoor gardener? These are the ones (like me) that live in an area with cold winters – too cold for most of their outdoor plants to survive in. By transplanting or bringing the plants indoors, they can survive the colder months and add greenery inside the home. There are some considerations and preparations that should be made before you decide to become a part-time indoor gardener.

window of plants and more mismatched chairs
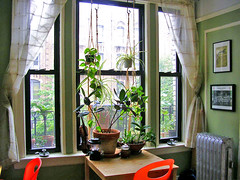
Image by wockerjabby via FlickrThe most important point to think about before bringing a plant indoors is whether or not it will survive being an inside plant. If the plant has high temperature or very high light requirements and your house does not get a lot of light in the winter time – it may not be a good solution. As a back-up you can invest in an artificial light source to supplement the natural light the plant will get.

How will you get the plant indoors? If the plant is already in a pot that will fit inside it is easy enough to move it indoors. But if the plant is in the ground you need to find a pot large enough to contain the root system and one that will not be too difficult to move. Keeping in mind that when a large plant is transplanted (re-potted or put in a pot for the first time) it may go into shock. Although with careful attention, you can nurse your plant through this.

Most likely you have been taking care of your plants outdoors and they do not have any pests or bugs on them. But it's always smart to double-check. By bringing an infested plant indoors you are putting all of your other indoor plants at risk of becoming infected too. Either forego bringing the plant inside or treat the pest problem before the cold weather arrives.

With a bit of attention to these considerations, it's easy to become a part-time indoor gardener, and you may find you enjoy having some of your plants inside all winter so much that you decide to keep some of them there come springtime!
Enhanced by Zemanta

Saturday, January 28, 2012

Video - Hybrid vs. Open-Pollinated Seeds

If you're interested in sustainable gardening (which you probably are if you're reading this blog!), you've probably heard of non-hybrid or open-pollinated seeds. Gardening sustainably means being able to sustain your gardening in a natural way, and for many people, that means saving your own seeds to plant the next year.

With hybrid seeds, this really won't work that well. Some hybrid seeds are sterile (meaning that the fruit they produce contains seeds that won't grow), and others simply may not produce fruit at all the second year, or they may give you a fruit you weren't expecting, which though interesting, doesn't really meet your needs as a sustainable gardener. So if you want to save seeds, you will need to choose a non-hybrid or heirloom variety.

If you're wondering what all the different seed types mean, this quick video gives a great overview of hybrid versus open-pollinated versus heirloom seeds - what they are, when to use them, and how to choose what is best for you and your garden.

On The Green Farms Organic Gardening Series - Part 2 (Hybrid, Open Pollinated, & Heirloom Seeds)
www.OnTheGreenFarms.com - What is a hybrid seed? Is it an evil word? Can I grow a 100% heirloom garden? In this video Jenny explains what each of the 3 types of seeds are and provides important information to help you choose the right type for your o...


You can find more information on non-hybrid seeds here: www.non-hybrid-seeds.com


Enhanced by Zemanta

Thursday, January 26, 2012

Planning Your Sustainable Garden? Grab A Non-Hybrid Seed Pack

More and more people are looking to grow their own vegetables to save money and to get the best possible organic produce. Now is the time to think about gardening again, as spring is on the way, and it is the perfect time to plan your spring and summer gardens.

If you are thinking about buying seeds for the upcoming gardening season, you might want to know about the difference between hybrid and non-hybrid seeds and why one is better than the other.

Non-hybrid seeds are also called open pollinated seeds. These seeds often yield better nutritional value in vegetables/fruits and any left-over seeds can be saved and stored for next year, which adds to the sustainability of your gardening.

The Non Hybrid Seed Family Pack contains a nice variety of vegetables, grains and fruits that should supply your family with a great rainbow choice of fruit and vegetables for the year and beyond.

Seeds included in the pack are: Brussels Sprouts, corn, various lettuce, melon, mustard, oats, onion, broccoli, Swiss chard, squash, tomato, carrots, wheat, water melon and others. The leftover seeds can be stored long term.

Overall, if you are planning on supplying your family with home-grown fruit and vegetables this year and in the years to come, then you should consider investing in non-hybrid seeds for the reasons mentioned above. The family pack offers a fantastic yield of produce at a great value. (And a few other tasty seed packs are listed below.)

Where To Buy: 
www.non-hybrid-seeds.com


order salad seed packs   grow your own chili peppers  fruit lovers seed pack  order greens seed packs

Enhanced by Zemanta

Tuesday, January 24, 2012

Planning to Grow Vegetables?

If you've been wanting to try growing your own vegetables, now is the time to start planning! I know it's still dead winter in most parts of the country, but planning ahead can give you a great head-start, which is especially important if you are just starting out in your gardening adventure.

Fruits and vegetablesImage by nutrilover via FlickrThe truth is that you can easily learn enough to be growing useful vegetable crops very quickly, and each session spent in your garden teaches you even more. You will learn much that is unique to your own situation, such as local soil conditions, your particular aspect in relation to the sun, and oddities that relate to your local microclimate. You will learn most of this simply by getting involved and doing it - always the best way to learn!

The taste of home grown vegetables is vastly superior to that of the commercially grown produce. Have you heard people complain that tomatoes no longer have any taste? They will have when you grow your own – you will never taste better. The lack of taste with the commercial crop is not all the fault of the growers, as they are under pressure to produce a crop of uniform size and color, that are durable enough to be shipped long distances, to the schedule of the wholesale market and ultimately the supermarket.

But you set your own schedule. The freshness of your own crop is a big plus. Vegetables I have bought from the supermarket, and stored in the refrigerator, have started to become inedible after a few days. I have had home grown produce still fresh in the refrigerator after 2 weeks! This is due to the fact that the stuff you buy in the supermarket (depending on what it is), can be several days to several weeks old already.

Typically, an effectively maintained and efficiently planted home garden will produce a generous yield, and can readily help pay for the cost of growing them. You can effectively end up having free vegetables. Summer, especially, is usually a time of abundance, even glut, as family and friends leave your place with perhaps more produce than they had expected to see.

A tip – when giving away fresh produce, try to limit your generosity – it is better to give a small amount to many rather than to give to the few more than they can actually use.

Vegetables BangladeshImage via WikipediaOne of the turn-offs to trying something you have not done before is the intimidating flood of information (and misinformation) you will receive. If you are browsing one of the major bookstores, you may find hundreds of books on the topic – which do you buy? To begin with, look for the simple, basic information. Do not bother with those full of jargon – you will learn the technical terms as you go. (And of course, visit this blog often, as we have loads of jargon-free sustainable gardening articles here!)

You will hear folklore from the family, such as “Uncle Henry always put ... (you name it) ... on his ... (name it again)”. Folklore is part of our heritage, but there is no guarantee of its usefulness.

You may even hear from the office genius, who has never gardened in his life, but still knows all the answers - just nod wisely, and then ignore him.

Gardening is much easier than you might gather from all this information that seems to sometimes fly at you. Plants evolved millions of years before humans, and they actually want to grow. It has been said that in many cases plants grow despite what we do to help them. If you provide the basics, and these are reasonable nutrition and regular watering, Mother Nature does the rest – let her work for you.
Enhanced by Zemanta

Gardening Books for Beginners:
   

Saturday, January 21, 2012

Video - Growing Dwarf Fruit Trees In Containers

Here is another great one from Patti, The Garden Girl. If you think of fruit trees as something you can't grow because you don't have enough space, think again! Patti shows how she plants dwarf fruit trees in containers on her patio. It may still take a few years for them to start fruiting, but you really can grow some nice fruit even in a small space.

One thing that she doesn't cover in this video (although she does in another video), is that you must remember to drill plenty of drainage holes in the bottom of the container before filling and planting - otherwise your tree (or any other plant) will drown, so be sure to do this whenever you are planting anything in containers, if they don't already come with holes in the bottom.

Container Gardening: Bare Root Cherry Tree
Patti, the Garden Girl, puts dwarf fruit trees into her patio container garden. Check out my Container Drainage Video for more info. Subscribe to Patt's free magazine! Click here visitor.constantcontact.com Check out Patti's websites www.gardengirltv...


Grow Your Own Dwarf Fruit Trees:
   

Enhanced by Zemanta

Thursday, January 19, 2012

Pruning Your Fruit Trees

If you have just entered the tree growing world, you have no doubt heard the term “pruning” tossed around by the more veteran growers. If you're not quite sure what it is, here is a quick rundown on what, how, and why.

Correct pruning of a branch - diagram User:MPFImage via WikipediaPruning is the removal of dead or unneeded branches to encourage the growth of flowers (and fruit). Usually a tree will end up devoting energy to branches that don’t need it, while neglecting branches which are bearing more fruit. If you remove the branches that are taking all the nutrients, you will begin to see a flourish in the other ones. Pruning also keeps the tree in shape by keeping the branches even. This prevents it from becoming weighed down on one side. Having too many branches on one side could cause the tree to become permanently crooked.

Many gardeners don’t even think about pruning their trees until they start to bear fruit. This is a big mistake, and you should never neglect to care for a tree just because it hasn’t yet begun to produce. During the entire process of growth, you should prune the tree in a way that it is even and uniform. Then, when it does start to produce fruit, the results will be significantly greater. It is very easy to tell the difference between a tree that has been pruned regularly during its growth, and one that has been neglected. Generally the shape of the tree is much more natural looking if it has been pruned.

The first thing to look for when you start pruning is any branches which are dead or diseased. These are quite easy to recognize. Usually they don’t bear any fruit, and might be misshapen or discolored. Don’t hesitate at all in chopping these guys off, as they are nothing but detrimental to the health of your tree. Sometimes a branch can be dead or diseased without making it too obvious. If this is the case, simply wait until the tree is flowering and it will become obvious by not growing anything.

Magnolia after corrective pruningImage via WikipediaThe second type of branch to look for is the branch that is too close in range to all the other ones. If it grows at such a length and angle that the end is right next to all the other branches, they might end up crowding each other out. Take off the smaller of the two branches to allow the larger one to have the breathing room that it needs. This same rule applies to the weight balance of your tree. Sometimes, for reasons we will never understand, a tree will grow several branches on one side and weigh itself into being lopsided.

So hopefully I have provided you with a basic knowledge of pruning. There are more situations and types of branches that require pruning, but what I’ve outlined is the very basic parts. These can alter depending on how old your tree is. For example, for the first 3 years of a tree’s growth it requires pruning that follows more “formative” guidelines. After the tree is well established, you will need to use “regulatory” pruning to keep it where you would like it to be. There are entire books written on how to prune trees depending on how old they are. There are far too many techniques for me to go over, so if you want to use these advanced techniques, check your local library, or grab one of the ones below.

A Few Good Books On Pruning:
   

Enhanced by Zemanta

Tuesday, January 17, 2012

Staking a Young Tree

This week we are doing a short series on fruit trees. Spring is the time for planting trees, pruning, staking, and all those things that are required for establishing young trees in your garden, so if you've been considering growing some fruit trees, now is the time to start planning!

When a tree is in the young stages, one of the most vital things you need to provide for it in addition to water and nutrients is support. If you don’t hold up the tree somehow, it might end up bending in a certain direction and growing extremely crooked for the rest of its life. So no matter what, you should always have some kind of support if your weather, exposure, and the type of tree warrant it.

English: Diagram of hole and staking arrangeme...Image via WikipediaThe most popular method of keeping young trees upright is to put long stakes into the ground on either side, and tie loops around the tree. Each loop should be fairly loose to allow for further expanding of the trunk. Lots of people just have a stake on one side of the tree, but this is not a good practice because it generally doesn’t allow for further growth of the tree.

You should only be staking your tree if you think that wind and other forces might be literally moving the ball of roots within the ground. Your staking should prevent all of this movement, because this is the most harmful thing that can happen to a young tree. It causes the roots to be in motion too much and not be able to properly get a hold on the soil so that the tree can develop normally.

Before you stake a tree, you should be completely sure that it needs it. If you constrict the movement and growth of a tree that doesn’t need to be tethered down, you could harm it beyond repair. For example, the staking mechanism you use could cause abrasion or “rashes” on the trunk. This will happen anyways, but why have it happen needlessly? Also, staking gives your yard an unnatural look and can present a hazard for people walking or running across the yard.

The staking process is actually rather simple. Just take 3 stakes and tie each one separately near the base of the trunk. If you use some sort of tether to prevent rope burn on your tree, that would be an even better solution. These can be purchased at any gardening shop, and are designed to be friendly to the bark of the tree. It is much better to stick with these instead of bare rope, to minimize the amount of friction the tree endures.

English: Tree planting at Bent.Image via WikipediaWhen you think your tree has been staked long enough to stand on its own, you should remove the stakes from the ground as soon as humanly possible. Every moment the tree is constricted it is losing some of its vitality. As soon as it seems like the wind is dying down around your area, look on the weather reports and see how much wind is forecasted. If the skies will be pretty clear for a while, you should at least temporarily take off the stakes.

To wrap it all up, you should never deny your tree a good staking. It is a completely necessary thing to do in certain situations. It is very crucial to understand when those occasions are, though. Staking a tree that doesn’t need it can be as damaging as not staking a tree that does need it. It might be beneficial for you to consult an expert, and get their opinion as to whether your tree should be staked, and for how long.
Enhanced by Zemanta

Saturday, January 14, 2012

Video - Flood & Drain Hydroponics System

There are a number of different types of hydroponics systems available for indoor hydroponics gardening. This video shows a demonstration of one type, called a "Flood-and-Drain" system, and describes some of the different things you can grow successfully indoors using this type of setup.

Have you tried hydroponics gardening? If so, we'd love to hear your comments and ideas below!

Hobby Hydroponic Gardening Indoors & Out
ProgressiveGardening.org | A lot of people are surprised that a full sized tomato plant can grow in a small pot without any soil! Carl Anderson of Virginia Hydroponics shows how easy it is to grow fresh cut herbs, tantalizing vegetables, and fabulous...


Examples of Flood & Drain (Ebb & Flow) Hydroponics Systems:
   
Enhanced by Zemanta

Thursday, January 12, 2012

Two Important Tips for Home Hydroponics Gardens

The requirements for plants are the same whether you are growing a garden traditionally or with a hydroponics method.  In hydroponics, the nutrients the plant would get from the soil are replaced by a growing medium that can be purchased at gardening supply stores. The need for water and light is still just as important though.  Light can come from a natural source, an artificial source or a combination of the two.  Depending on the type of  hydroponics system the method that your plant gets water will differ too.

English: hydroponics plant 5Image via Wikipedia1. In order to get the best results from your home-based hydroponics garden, find a south-facing window to give the plants the best natural light.  If this isn’t possible, you can purchase special lights that are specifically designed for plants.  Instead of using a fluorescent light, buy what is known as a discharge light. This imitates the light the plants would naturally get from the sun and will produce healthier and hardier plants.

2. The water that the root system is growing in needs to be healthy water full of nutrients and this can be determined by checking the pH level (it should be a pH level of 6). The pH level should be checked on a regular basis to ensure it is not too acidic or alkaline. If the reading is too high, add small amounts of vinegar and keep re-testing until you can the reading you want. If the water reading has a pH level that is too low, use the same procedure to raise the pH level except use baking soda instead of vinegar.

By growing your plants with hydroponics, you will see faster and more abundant growth. The method in which the plants get their nutrients is more efficient and results in robust and prolific plants – whether they are houseplants, vegetable plants, or herbs.

Enhanced by Zemanta

Helpful Hydroponic Gardening Resources:
   

Tuesday, January 10, 2012

Hydroponics and Indoor Gardening

English: hydroponics plant 6Image via WikipediaIf you have heard of hydroponics or other methods of growing plants without soil and want to try it out at home, you can. Hydroponics systems are generally pretty easy to care for and set-up at home. There are materials you can buy or some you may even be able to find around the house.

The dirt or soil that you use to grow plants in a traditional method is substituted with a growing medium (full of nutrients the plant needs to grow) in hydroponics gardening. The growing medium is fed directly to the roots by method of a drip-feeder. The system can be automated and the gardener can control how many drips the roots receive in a specified time frame. The more of the growing medium the faster the plants grow.

Since the system can be automated, the amount of time and energy that is required to maintain a hydroponics garden is less than with a traditional garden. As long as enough water is present and growing medium the plants can be left unattended for a longer period of time.

Hydroponics with leafy vegetables.Image via WikipediaA home-based hydroponics garden can grow vegetables year round. The concerns about pests and the composition of the soil are less of an issue with this type of gardening. Another bonus with this type of gardening is how fast you can have mature vegetables indoors (by increasing the amount of growing medium).

The types of plants that are best for hydroponics are ones with thin spider-like roots. Plants that have a bulb root system are still best grown in the traditional soil method inside a pot or outside. When you are ready to begin, germinate the seeds for your plants like you normally would. When the seed has started to sprout and has approximately 2-5 millimeters of growth it is ready to transplant to the hydroponics container and begin growing.

Be sure to check back later this week for more tips on hydroponic growing systems and indoor gardening!
Enhanced by Zemanta

Saturday, January 7, 2012

Video - Starting Plants in Homemade Bio-Domes

Here is a pretty cool video which demonstrates step-by-step how to build a biodome (which requires no further maintenance) to start seeds. This will help your plants get a good head-start for planting out later, or in some cases you may actually be able to keep the plant in here, but it depends on the type of plant you are trying to grow (for instance, tomatoes will need more space and soil to produce fruit), but it's still a great way to start plants and get them going good before planting them outside. And hey, it's also recycling! :-)

Enjoy the video, and check out the link below as well, for an update on the seeds she planted here - and of course let us know if you try this, and what you think!:

Growing Veggies indoors. 2 Liter Bio-Dome Organic Gardening
Im really interrested in some feedback if anyone tries this. Let me know if I didnt cover something and you have a question. I will post an update on the broccoli after it comes up a bit. :)


Update Video on her Biodome Garden: http://www.youtube.com/watch?v=7PglxavZifQ&feature=mfu_in_order&list=UL
Enhanced by Zemanta

Thursday, January 5, 2012

Winter Gardening With Hydroponics

Using hydroponics is an interesting and unique method of gardening. Since it is often done indoors, it works great for winter gardening (if you're not quite brave enough to try the outside kind - more on that coming soon!).

English: hydroponics plant 7Image via WikipediaHydroponics was derived from the Greek word hydro, which means "water" and ponos, which means "labor or water-working". Hydroponics gardening involves growing plants with their roots in other nutrient solutions and without soil.

Hydroponics gardening is as simple as ordinary gardening. Both of them necessitate sufficient light, water, temperature, light, and humidity. But with hydroponics, no soil is used. Instead a soil substitute holds the roots while nutrients are carried by the water. Indoor hydroponic gardening is not that hard and plants respond well to this method of growing.

This is one of the major considerations in hydroponics gardening since it sustains the plants. One has to make sure that this nutrient solution maintains a pH level of 5 to 6 after dilution. In hydroponics gardening, the plants should be watered more than three times a day. this is usually done using a pump and timer.

If your hydroponics garden is located indoors, the most suitable temperature is between 71 to 76 degrees Fahrenheit. Of course, this temperature may change depending on the different types of plant you are working on, e.g. tropical plants.

NASA researcher checking hydroponic onions wit...Image via WikipediaPlace your plants somewhere they can receive ample amounts of light. Otherwise artificial light must be used. High pressure Sodium lights or bulbs are a suitable substitute for natural light.

Humidity is good. When the room’s temperature rises, the air will be able to hold the sufficient amount of moisture your plants will need.

A hydroponics system can be fully automated. Since it is water-based, the gardener has no soil to dig or weeds to pull. Also, the water can be re-used to prevent waste.

With hydroponics, an excellent yield of quality plants can be easily achieved. Home hydroponics systems and DIY kits are are readily available in most hardware stores, and online (see below for a few examples).

Hydroponics Gardening Kits:
   
Enhanced by Zemanta

Tuesday, January 3, 2012

No-Dig Gardening

Welcome back, and Happy New Year! I am looking forward to a great garden in 2012, and newly armed with several excellent gardening books which I received for Christmas, I am full of inspiration right now! Some of my new finds relate to growing vegetables in small spaces (intensive planting), and gardening year-round (winter gardening), so I'll be sharing some of my new findings with you soon.

No dig gardenImage by Samuel Mann via FlickrOne of the methods discussed in some of my intensive gardening books is no-dig gardening. The idea of no-dig gardening was developed by an Australian named Esther Deans. It was originally both developed both as a labor saving idea, and a method to rejuvenate badly depleted soil in a vegetable garden.

The process involves starting with layers of newspaper, and by adding lucerne hay, straw and compost in succeeding layers, you can create a growing medium without resorting to heavy digging, and one that is rich in nutrients and which will simplify weeding and encourage your much desired plants to grow. The layers compost together, and greatly encourage earthworms. The gardens are maintained by adding manure, compost, etc., and should not be dug up, as this will undo the good work. Many people are using this method of gardening, and it works well in many cases.

The principle of not digging has sound foundations. Excessive cultivation of the soil, especially when very wet or very dry, will damage the structure of the soil, and lead to compaction. Such excessive cultivation can also discourage the earthworms, and they are the best free labor a gardener has!

Unloading a truck-load of mulchy soil for gard...Image via WikipediaSome followers of permaculture (sustainable gardening) and organic gardening have translated no-dig into never-dig, which I believe is sadly mistaken. If you start with a base soil that is badly compacted, then your no-dig garden may initially work well, but you may find your garden does not continue to perform well. The fertile layer you have built up will encourage the earthworms, but we do know that the worms need to shelter from excessively hot, dry, cold or wet conditions. They have been found to seek shelter from extreme conditions by burrowing more deeply into the soil, sometime many feet down. If they cannot shelter in this way, it is my contention that they will die out or move out.

My belief is that an initial cultivation of the soil before you apply the no-dig system will guarantee a better environment for the worms, and thus a better garden for growing your plants, over the longer term.

By all means give the no-dig approach a try – you may find it works very well for your gardening needs.

A Couple of Good No-Dig Gardening Resources If You Want To Learn More:
   

Enhanced by Zemanta