Showing posts with label Plant. Show all posts

Wednesday, March 18, 2015

7 Gardening Mistakes to Avoid

For gardeners, nothing in the world stinks more than working your butt off in the hot sun to care for and maintain your garden, only to have something go terribly wrong due to an unexpected problem or oversight. You worked hard for your crops so the last thing you want is for something to go wrong and destroy all of your hard work. 

Don't let any of these mistakes happen to you! Be prepared with this list of 7 easy-to-make gardening mistakes to watch out for:
  1. Planting in the wrong place – Always take care to look closely at the growing needs of all of your intended crops. Make sure to read the sun, water, and weather requirements for each of the fruits and vegetables that you want to grow, and plant and place your garden beds or planters accordingly. Better yet, you should take careful stock of your available space before you even decide what to plant, examining the soil, drainage, and even how and where the sun hits best during planting and growing months. Taking a little time to survey your yard beforehand can save you a heap of trouble down the road.
    English: transplanting plants from starter pot...
    Transplanting plants from starter pots to the garden (Photo credit: Wikipedia)
  1. Buying diseased or unhealthy plants – If you're the type that just wants to buy starter plants for your garden and pop them in the ground, make sure to pay extra special attention to the plants you're buying. The gardeners who took care of these plants before you might not be as diligent or as careful as you are, so take a close look at the quality and color of the plant's leaves when making your choices. Also make sure to look closely for insect damage, especially if you're bringing new plants to an existing garden bed. The last thing you want to do is introduce pests to a clean, insect-free garden that you've worked hard on.
  1. Not preparing the soil – Or even trying to fix a preparation mistake too late! This goes hand in hand with the first potential mistake; you should make sure that your soil is prepared and ready to take in all the new plants you'll be planting in it. Soil testing kits are cheap and easy to use and can be found at your local gardening or home improvement store. Soil varies greatly by region and each type of soil needs something different to make it suitable for your plants. If you plant without preparing, be incredibly careful because doing work on the soil while new plants are establishing their root systems can have a disastrous effect on their growth and general health.
  1. Not watching your watering – Each plant has their own needs and requirements when it comes to watering so you should be especially careful if you have a wide variety of fruits and vegetables in your garden. Overwatering can drown your plants' roots which will cause them to rot and kill your plant. On the other hand if you don't water enough your plants will get dehydrated, sometimes causing even more damage than if you had watered too much. (I made this mistake back in the fall when we had moved into our new house, and for the first time all summer, we didn't get rain for several weeks. I forgot to water my newly transplanted strawberry plants, and several of them died.) You should work to find a good balance and make sure to group plants with similar watering needs together to make things easier on yourself. If you're worried about watering yourself you can always purchase an automatic irrigation system which will take care of the work for you.
  1. Not accounting for space – Of course you want your garden to bursting at the seams with fresh fruits and veggies to enjoy, but if you pack it too full then you're going to end up in a lot of trouble down the road when instead of tiny seedlings you've got an overcrowded garden full of growing plants. Always make sure to zone your beds and take into account what size the plants will be when they're grown as you plan out your available space.
  1. Planting an overly invasive species – Reading your plants' tags can give you good insight on what growing them will be like. Sure a plant that's hardy, grows well in most climates, and spreads easily sounds like it'll be a snap to take care of, but if you're not careful you could end up seeing your tiny garden bed spread well beyond the confines of its walls. Always make sure to read your tags closely and keep any potential rampant growers well in check.
    English: Garlic mustard in flower along the Po...
    Wild garlic mustard is a common invasive weed in some areas. (Photo credit: Wikipedia)
  1. Taking the wrong approach to weeding – Without a doubt you're going to end up with weeds in your garden. I'm not saying you're a bad gardener, it's just an inevitability of nature that these tenacious plants will find a way in and stay there as best they can. When you're preparing your space, make sure not to use any harsh chemicals that are going to sit in your soil and make the space just as inhospitable for your garden as it is for the weeds. While you don't need to be inspecting your bed with a magnifying glass every hour of every day it's a good idea to at least check your bed at least once a day for any offending invasive species before they get out of control and start taking over your garden.
Gardening can be hard work, but this isn't meant to make it sound off-putting. On the contrary, now that you're armed with the knowledge of what not to do in your garden, you can plant a beautiful garden with confidence that you won't make these mistakes yourself!


Wednesday, March 11, 2015

How to Plant a Vegetable Garden in Four Easy Steps

If you love to cook, growing your own vegetable garden is one of the most rewarding things you can do. When you grow your own garden, you can harvest fresh seasonal fruits, veggies and herbs as you need them instead of having to drive miles to the nearest grocery store. It just doesn't get any fresher - or healthier - than that!

Here's How to Plant a Vegetable Garden in 4 Easy Steps:

Step #1. Decide What You Want to Plant.

The front cover of a 1901 Burpee Seed-Sense ca...
Cover of a Burpee Seed-Sense catalog (Photo credit: Wikipedia)
This is the fun part. Start by making a list of all the recipes you frequently make. Note which vegetables and herbs you use over and over again, because this will tell you not only what you should plant, but also in what quantity. 

Don’t forget to jot down other items your family enjoys, even if you aren't using them in your cooking currently. Growing your own vegetable garden is a great way to expand your culinary horizons.

This planning phase is a great time to get your children interested in gardening, too. Ask what they might like to grow or make fun suggestions if they are too young to come up with ideas on their own. Pumpkins, ornamental gourds and sunflowers (for their beauty and seeds) are popular choices with kids of all ages. Fast growing plants, such as lettuce and beans, are also great choices for children because they produce noticeable results quickly.

Once you've made a list of plants you want to grow, collect mail order catalogs, search online or stop by your favorite garden center to find seeds and transplants. You can learn a lot about what grows well in your area by tapping into these resources, as well. This is a really fun way to pass the time in late winter before it's warm enough to get outside and start planting!

Step #2:  Pick a Location for Your Vegetable Garden

Just like in real estate, planting a successful vegetable garden is all about location, location, location. If you want your plants to thrive, there are a few non-negotiable items you will need to provide:

1. Sunshine. Pick a sunny location with at least 6 hours of direct sunlight per day.

2. Water.  Make sure the location you choose has easy access to water. You will need to water your plants whenever Mother Nature refuses to cooperate, so make sure you have a convenient source of water nearby.

3. Accessibility. Gardens need care, so position your vegetable garden in an area that is convenient to get to with the tools you need to work in it. If you place it too far from the house or garden shed where you keep your tools or in an area difficult to reach with a wheelbarrow, you may find yourself tempted to neglect it.

Make your life easier and plant your garden in the most convenient sunny location you can find.

4. Good Drainage. You may have to do some work for this one, especially if you live in an area with heavy clay or compacted soil. If you find the area you want to plant tends to collect standing water, you will want to build your beds up to protect your plants from overly wet feet.

Step #3: Create Your Garden Beds

Once you’ve identified where you want your garden, you will need to decide where you want the individual beds within it. As you are doing so, keep in mind the orientation of the sun throughout the day because taller plants or those growing on trellises can cast shadows and stunt the growth of nearby plants if they aren’t positioned correctly.

To create the individual beds, many old school gardeners swear by the traditional practice of removing heavy layers of sod, then tilling and amending the soil beneath it before planting your vegetable plants. 

Although this method will certainly work, you simply don’t have to work that hard.   Instead, you can use one of my favorite methods - the Lasagna Gardening method - of building your beds UP instead of digging down to create them. This methods works equally well with raised garden beds or directly on the ground.

To get started, add flattened cardboard or a thick stack of newspapers on top of the ground and then add alternate layers of peat, topsoil, aged manure or barn litter, organic mulch, yard clippings and/or compost. 

You can either prepare these beds months in advance or right before you plant. Either way, the layers will meld together into a beautiful, rich soil for your plants.

For more details on this no-dig gardening method, check out Lasagna Gardening: A New Layering System for Bountiful Gardens.

Step #4: Start Planting!

Once your beds are ready, it’s time to start planting!

Before you start digging, you have some choices to make: you can sow seeds directly into the soil, start seeds indoors then harden them off outdoors before adding them to your garden, or plant established transplants you’ve purchased directly into your prepared beds.

Some plants require direct sowing, while others need to be started indoors several weeks before the frost-free date in your area in order to perform well. While you are creating your list of plants you want to grow, make a note of the growing requirements for each so you can give your plants the best chance of survival. 

If you decide to follow these four easy steps to planting a vegetable garden, you will be rewarded all season long with an abundant supply of fresh and healthy produce. Plus, you’ll have the added satisfaction of knowing you did it with your own two hands!

Also Check Out These Helpful Resources for Planting a Vegetable Garden:
   

Wednesday, February 11, 2015

Planning A Productive & Practical Potager

A well-planned potager, or kitchen garden, can be a beautiful and enticing way to incorporate more fresh fruits, vegetables and herbs into your diet. The following tips will help you plan a productive and practical potatger.

Potager en plate-bande
(Photo credit: Wikipedia)
Tip #1: Pick the Perfect Spot.  When choosing a location for your kitchen garden, try to find a spot as close to your kitchen as possible.  After all, you want your own personal culinary garden to be easy to reach while you are preparing meals.

The location you choose must also take into consideration the kind of environment your plants prefer. Choose a sunny location that receives at least 6 hours of direct sunlight per day. If you live in a really hot climate, you may find a bit of afternoon shade is nice to have, as well.

Also, you’ll want to make sure the location you choose has easy access to water. You definitely don’t want to drag a heavy garden hose around the house or carry buckets of water in order to keep your plants hydrated.

Tip #2: Pick Your Plants. The easiest way to decide what you want to grow in your potager is to think about what you like to cook.

For example, if you use a lot of fresh herbs, you’ll want to keep a big pot of your favorite varieties on hand. Kids can’t get enough of your homemade salsa? Plan to have a steady supply of fresh cilantro and juicy tomatoes nearby.

In other words, you want to stock your kitchen garden with the fruits, vegetables, herbs and edible flowers you use in your day-to-day cooking.  These are the items you will want to have convenient access to throughout the growing season. Items you plan freeze, can or otherwise preserve for later use are ideal for your regular vegetable garden.

Jardin potager 6
A potager using trellises for vertical space. (Photo credit: Wikipedia)
Tip #3: Make the Most of the Space You Have.  Due to their proximity to the house, many kitchen gardens are confined to a relatively small space. If your proposed potager has a small overall footprint, don’t get discouraged. Instead – look up!

Take advantage of as much vertical space as possible to maximize your growing area. Consider growing juicy yellow pear tomatoes surrounded by creeping thyme in a vertical container or use hanging baskets suspended on shepherd hooks for your favorite herbs. Just make sure you keep them well watered as hanging baskets tend to dry out more quickly.

You could also add a trellis or incorporate a fence into your design to provide support for climbing plants, such as pole beans or cucumbers. If your potager has a blank wall with good sun exposure, you could add a ladder-like series of shelves to house a lot more plants than you could fit into the ground you have available.

Tip #4: Make It Beautiful. Although some may argue that beauty for its own sake is neither productive nor practical, I disagree. Your kitchen garden is an extension of your home and will likely be visible to your family and guests. So, making the area as attractive as possible just makes good sense. 

Balance, symmetry and repetition are components of any good garden design. To incorporate balance and symmetry into your potager, try adding two matching brightly colored containers filled with herbs and place them on each side of the entrance.

For repetition, add multiples of the same plants throughout the garden. For example, a group of 3 cherry tomato plants in attractive containers will have a stronger visual impact than a single plant. You can also create a sense of order by planting lovely borders of edible flowers or fragrant herbs along walkways.

One great thing about incorporating ornamental aspects into your potager is you may find you want to spend more time in an area that nourishes both your body and soul.

Wednesday, January 28, 2015

Vegetable Gardening Apps For Your Phone or iPad

Raise your hand if you love to grow vegetables! Raise your hand if you like cool apps for your phone! Why not combine the two and download a couple apps specifically geared for vegetable gardeners?  It might seem a little strange - gardening has to do with getting physical outside and getting as far from your phone as possible, right? But keep an open mind here; these apps can educate you on various aspects of planning and growing your veggies and make your gardening life a little easier.

English: The "Made for iPod, iPhone, iPad...
 (Photo credit: Wikipedia)
Check these out:

Gardening Plant Care Videos. All the How To videos you could want, in your own personal phone library. There's everything from continuous lettuce harvesting tips to how to graft a fruit tree to how to grow vegetables upside down.

Garden Compass. One neat thing you can do with this app is take a picture of a plant or problem/pest you want identified, send it to their experts and you will get a response within 24 hours.

Vegetable Garden Planner. Want to know how many seeds or seedlings to plant to feed your family? This is the app for you. No more planting enough to feed an army, unless you want to feed an army.

Vegetable Gardening (Grow Planner). This app provides an all-around education - how to start, how to plant, how to harvest and what to do with your harvest (canning, cooking, freezing, drying, pickling and eating). It can even show you how to create a root cellar and how to grow herbs indoors.

Gardening Toolkit. A wealth of information here. It gives you info on vegetable plants as well as how to plant them - seed depth, days to germination, when to sow. This application will even give you info on companion planting. You can store all the material on plants and trees you're interested in in one spot for quick reference.

eWeather HD. You can see your current temperature and precise hourly forecasts.  It even has a radar screen. As a gardener, you know how quickly a hard freeze or hail can damage your tender plants.

Now obviously an app won't grow your veggies for you. There is no substitution for getting out there and getting your hands dirty; you not only grow vegetables but you grow experienced. But hey, if a cool phone app can help you in any way get in better with Mother Nature, then go for it - and have fun planning your new garden!

Wednesday, September 17, 2014

Growing Fruit Trees: Worth The Wait?

Welcome back! We apologize for the lack of a post last week; after moving into our new house, we had some problems getting the internet up and running.... Thankfully we are connected now, and back in action! One of the things we are planning for our new property is to plant some fruit trees. So I figured it would be a good time to explore this topic for the next few weeks. This week, we're starting off by exploring the pros and cons of growing fruit.

Nectarine (Prunus persica) fruit development o...
Nectarine (Prunus persica) fruit development over a 7½ month period, from early winter to midsummer. (Photo credit: Wikipedia)
When you think about growing a garden you generally plan to plant seeds one afternoon, spend a few weeks to months taking care of them, and then finally having something you can cook or eat fresh right off of the vine or or out of the ground right away. Fruit trees on the other hand are a much longer investment of time and effort, but continue to yield results year after year even when other plants will have long since been harvested and replanted. If you're thinking about planting fruit trees, then you should make a few key decisions before you start and along the way.

First of all you have to decide if you want to reap the rewards of your work within a short period of time, or if you're actually willing to wait for your work to come to fruition (no pun intended). It can take years for a fruit tree to actually mature enough to start bearing fruit and it can be a long and arduous process of maintenance, pest control, and care that can end up failing and coming to nothing if you aren't prepared, or don't put in the proper time or effort. However, if you're the type of person who doesn't mind settling in for the long haul then you can enjoy delicious fresh fruit year after year once your tree has matured.

Something else that you should think about as you're deciding whether or not to plant fruit trees is what kinds of fruit you might want to grow. There are many factors that come into play when you decide to plant fruit trees such as the condition of your planting area (such as the yard space you have to work with and the quality of the soil) as well as the climate and seasonal harshness of the area you live in. Some places are great for growing fruit trees and will have no problems seeing your trees thrive and flourish, but if the area you live in is subject to harsh seasonal swings you may be limited in the types of fruit you can successfully grow.

English: Pieces of fruit in a basket Nederland...
(Photo credit: Wikipedia)
One unique perk that fruit trees offer (one that you might not initially realize) is the value that it adds to your home and property. Even if you never plan on selling your home, think of what your fruit trees will offer to you, your family, your friends, and your neighbors. You don't just get the bonus of having a tasty treat you can pluck straight from the branches in your yard, you also have a healthy snack you send to school with your children, ingredients you can use in cooking for family get-togethers, fruit you can preserve for the winter in various ways or to give as gifts, or simply fresh fruit you can gather into a gift basket. The benefit of having fruit readily available is practically endless.

In the end what it all comes down to is whether or not you're willing to persevere through the hard work and long wait of your fruit tree maturing to the point it can actually bear fruit. Even if you start with a partially grown tree that you transplant you will still have to put in the effort of nurturing and acclimating it to its new home while also guarding its safety from insects and disease. If this is something that you think that you can do then planting a fruit tree is definitely worth the wait when you can finally sink your teeth into a crisp apple, juicy pear, or whichever delicious fruit you've decided to grow.

Be sure to stay tuned next week, when we'll discuss the first steps you'll need to think about when planting your fruit trees.

Wednesday, July 30, 2014

Succession Planting - Grow More Vegetables in Less Space

If you have a small amount of space to plant a vegetable garden, you are probably eager to get the most out of it. Succession planting is a great way to accomplish this. This practice involves growing the same or complementary crops in the same spot continuously throughout the season in order to maximize the yield a garden can produce. In other words, succession planting combines the efficient use of space and timing to obtain better results. 

Gelbe Rüben und Zwiebeln in Mischkultur; Compa...
Companion planting of carrots and onions (Photo credit: Wikipedia)
Many novice gardeners mistakenly believe that planting and sowing seeds is a one-and-done process that only happens at the beginning of the growing season. So, they head out to the garden each spring, get some plants and seeds in the ground… and wait for the magic to happen.

Unfortunately, following this one-off approach to planting is almost guaranteed to cause many peaks and valleys in what can be harvested throughout the season. If you want your garden to produce an abundant supply of fresh produce all season long, you need to plan ahead for it.

Plan Ahead for Successful Succession Planting 

To create a successful succession-planting plan for your garden, you need to take a number of variables into account. For example, you’ll want to consider how long each crop takes to reach maturity, how long it produces once mature, and which crops can be harmoniously planted in the same space at different times throughout the season.

Although the number of variables involved in succession planting may seem a little intimidating at first, don’t let that discourage you. It may take some practice, but you can definitely get the hang of it. If you are just starting out, choose only one or two beds or containers to practice in your first year. Also, take detailed notes in your garden journal throughout the growing season so you know what worked - and what didn’t - when next season rolls around.

Getting Started with Succession Planting

Before you start digging in the dirt, you’ll want to have a good idea of what you plan to grow. Start by making a list of which plants you want to grow in your succession planting area. As you are compiling this list, make sure you note the correct variety of each plant, because there is a lot of diversity among different varieties of the same plant species.

Then, next to each plant variety on your list, note how long that particular plant takes to reach maturity, is it heat or cold tolerant, how many hours of sunlight it needs each day, what type of soil it prefers, and its spacing requirements. The back of seed packets and garden catalogs are great starting points for this exercise.

Aeroponics-companion-plantings
(Photo credit: Wikipedia)
Once you know what you’d like to grow in your selected space, decide if you want to focus on growing the same crop throughout the season or if you want to try inter-planting more than one variety. Lettuce and herbs like basil and cilantro are great for repeated sowing all season long. However, if you want to try more than one crop, try to find a couple of recommended companion plants for your favorite choices.

If you need more information on companion planting, there are tons of great resources and books available on this topic.  The best ones provide a lot of great information to help in your planning process.  Online resources are nice, but it’s always good to have a hard copy on hand for future reference. (Click the "companion planting" tag below this post for more articles on this topic - and check out the suggestions below for some hard-copy resources.)

Although succession planting may seem complicated at first, you’ll be amazed at how quickly you can make it work for you. By applying the principles of succession planting to your own backyard garden, you’ll soon be growing more fresh fruits, vegetables and herbs throughout the season than you ever thought possible.

Recommended Resources for Succession & Companion Planting:
   

Wednesday, July 16, 2014

The Cost of Growing Your Own Veggies - Part 2

We've already covered some of the costs involved in starting a vegetable garden and now we're going to discuss a few more. That way you’re going into this endeavor with your eyes wide open.

If you're going to be a gardener, you need some tools to tend the garden. You don't have to have every gizmo out there, just the ones you'll really use. Research some of the tools and pick what will work best for you and your situation. Tools are something you buy once, although garden gloves are a different story.

How to save: Look for sales on the tools you need, especially when it's off season. You'll get better deals at the end of summer rather than in the spring. One place to get spectacular bargains are at estate sales. Once you have the tools, you should take good care of them. Make sure you put them away somewhere where they are protected and store them clean. At the end of the season give them a good cleaning and add a coat of protective oil as directed. (Check the gardening section of our website for good prices on some recommended tools.)

Every year you need plants to stick into the ground, right? Not necessarily; some plants will over-winter so you don't have to start totally over. Other than that, yes, plants are needed.

Save Seeds spelled out with runner bean seeds
Runner bean seeds (Photo credit: Wikipedia)
How to save: It depends on where you live but take note of many herbs like rosemary and oregano that will come back the next season. Others might be mint, onion, garlic. 

How to save: Save your seed at the end of the season. Using your own seed is much cheaper than buying new plants. You'll find the seeds in the heads of the dried flowers. Store them in marked envelopes or bags for future use. You won't ever again have to buy onions, lettuce, cilantro, carrots and more. (Note: If you grew plants from hybrid seeds or seedlings, you won't always get good results if you save their seeds. Grow open-pollinated or heirloom varieties if you want to save seeds.) If you don't have seeds to save, buy packets of seeds and start them yourself rather than seedlings as this is certainly less expensive.

Watering your veggies can really cause your water bill to go up in the summer.

How to save: Water by hand, if possible, and not with a forget-about-it sprinkler that also waters your fence, sidewalk, and part of the house. Water in the early morning or evening (depending on where you live) so that you don't lose the water to evaporation from the sun. You could also set up a drip irrigation system, which feeds a small amount of water directly to the roots of the plants, and minimizes evaporation.

Also, consider planting things a little closer together so the leaves of the plants help shade the ground in the plot. This, and using a mulch to cover the bare ground can help conserve water by keeping the moisture in the ground longer. Of note - if you live in a dry, arid place, raised beds might not be the best solution for you as beds above ground tend to dry out faster.

Having your own vegetable garden is rewarding in so many ways. To help keep the costs down and make it worth your money to grow your own, consider the above tips.

Wednesday, July 9, 2014

The Cost of Growing Your Own Veggies - Part 1

There are many reasons to grow your own vegetables. You get to eat food that hasn't been tainted with chemicals and you feel great satisfaction that you're able to nurture life from a mere seed in the earth to a fresh vegetable on your table.   Besides that, it's just fun (most of the time) to work in the garden in the fresh air, with maybe some family members right there alongside you.  But one of the biggest reason people give for wanting to start their own garden is that it will save on their grocery bills. But does it really?

Yes and no. It depends on how you go about it and how long you've been doing it. Let me explain.

There are initial costs involved in setting up your plot(s). If you're going to do containers or some sort of raised beds, there's the cost of the materials. This should be a cost that doesn't occur frequently unless you use something that's not durable and has to be replaced often.

Tai O vegetable garden
(Photo credit: Wikipedia)
How to save: Use lumber you've been storing to build the beds or old containers scavenged from friends and neighbors. Know anyone who's repurposing? Fences or decks being torn down might give you the lumber you need. You can also look for damaged and discounted boards at the lumberyard. Just be sure that you're using untreated lumber, as treated wood contains chemicals that can leach into your garden and affect the health of your plants - and ultimately your family.

Then there is the cost of soil and fertilizer to fill up your plots. If you're working with depleted soil or deadpan, more amendments will be necessary. This is usually an up-front cost, but you might have to top off your beds every year with more soil.

How to save: Don't buy bag after bag from the home improvement store unless they're having a good sale. Buy in bulk from a garden center or landscaping firm. You can save on delivery if you borrow a truck and go pick it up yourself.

Know that fertilizer is important to any garden plant. Fertilizer gives them the nutrients they need for healthy production. Compost enriches the soil and that's why it's nicknamed "black gold" by many gardeners.

How to save: Make your own compost. It can be as simple as using an old plastic garbage can and drilling some holes into it, then throwing your kitchen scraps (non-meat), garden waste, old leaves, and grass clippings into it. Using your own homemade compost can mean better soil which means stronger, healthier plants and better vegetable yield. Make a fertilizer from compost tea and use that plus other home remedies instead of buying expensive bagged or bottled products. (Click the "compost" tag below this post for an extensive list of how-to articles on composting.)

Here you have just some of costs associated with having a vegetable garden, plus some tips on how to make these costs less of a strain on your wallet.

Next week, check back for Part 2, and learn how you can save on tools, plants, and watering costs for your garden.


Wednesday, June 11, 2014

How to Build Raised Vegetable Garden Beds

There are many benefits to using raised vegetable garden beds in your garden.

For starters, elevated garden beds are easier on your back and knees because they require less bending, kneeling and crawling than regular beds.  In addition, raised garden beds offer better drainage, which means your plants aren’t stuck sitting in excess water every time it rains. Plus, it is much easier to build your soil UP than it is to work amendments into the ground.  

Fortunately, building raised vegetable beds is a super easy do-it-yourself project. All you need are some readily available tools and materials, and an extra pair of hands.

How to Build Raised Vegetable Garden Beds

White House Kitchen Garden
(Photo credit: angela n.)
Tools and Materials: 
 (makes two 8’ x 4’ x 6” high beds)
  • (6) 1” x 6” x 8’ cedar boards* – 2 boards cut into 4’ sections
  • Wood screws and/or 8 metal corner brackets 
  • Power drill
Important Note: Cedar is naturally insect and moisture resistant, so it tends to hold up well in outdoor environments. Avoid using pressure treated lumber for your food growing areas because the chemicals used to create them can leach into your soil.

*Cedar boards come in a variety of lengths and widths. Obviously, using 6” wide boards will give you more shallow beds than 10” boards. Choose whichever length and width combination you prefer. If you find 4’ beds are too wide, simply reduce the length of each shorter section to 3’ – 3.5’.

Instructions:

To assemble your raised vegetable garden beds, line the ends of an 8’ foot section and a 4’ sections up so they form an “L” shape. While your helper holds the boards in place, secure the two boards together with wood screws or with the metal corner brackets. 

Repeat this process with the remaining cedar boards until you create 2 wooden rectangles, each measuring 8’ in length by 4’ in width.

Once your beds are assembled, carry them a sunny spot in your garden and place them where you want your raised beds before you begin filling them.

Raised bed of lettuce, tomatoes, 6 different t...
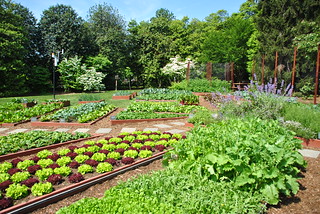
Raised bed of lettuce, tomatoes, 6 different types of basil, marigolds, zinnias, garlic chives, zucchini. (Photo credit: Wikipedia)
Filling Your Vegetable Garden Beds

Of course, you can fill each bed with pre-packaged gardening mix, but you may find that gets a bit pricey. You can also create your own more cost-effective planting medium very easily.

Start by adding a thick layer of newspaper or flattened cardboard across the bottom of your raised garden box. This will help prevent weeds and grass from growing up into your planter. Then, add alternating layers of peat moss, compost, aged manure or barn litter, and topsoil.

You can add additional amendments, such as bone meal or a slow-release organic fertilizer, once you decide which plants you want to grow in each bed and you’ve conducted soil tests to determine what nutrients your soil needs to accommodate those plants.

If you prepare and fill your raised beds in the fall, simply cover them with dark plastic to “cook down” all winter.  You will be rewarded with beautiful rich soil in the spring, but it will be quite a bit lower than you remember – so be extra generous when filling the beds.

If you assemble your raised vegetable garden beds in the spring, you can plant right into the layered mixture. Over time, the layers will break down to form a rich soil. In the near term, your plants will do just fine in it as long as you don’t use fresh compost, manure or barn litter, all of which can “burn” your plants.

As you can see, learning how to build raised vegetable garden beds isn’t difficult. If you follow these easy instructions, you can look forward to years of more rewarding and efficient gardening!

Note: If you don't want to build your own, you can also buy raised-bed gardening kits:
     
Enhanced by Zemanta

Wednesday, June 4, 2014

3 Must-Know Vegetable Gardening Tips

Welcome back!  We're back from vacation - it sure is good to see how much the garden has grown! How is your garden coming along this summer?

Few things in life compare to the simple pleasure of biting into a freshly picked tomato while it is still warm from the summer sun! When you grow your own vegetable garden, you can experience this little piece of heaven all season long.

However, growing an abundant supply of fresh vegetables year after year takes some practice - especially for organic gardeners. For most people, becoming a consistently successful vegetable gardener comes after years of hands-on experience. However, you can shorten your own learning curve by adopting some tried-and-true vegetable gardening tips from the pros.

Here Are 3 Vegetable Gardening Tips You Need to Know:

Tip #1: Amend Your Soil. 

Compost, millésime 2007
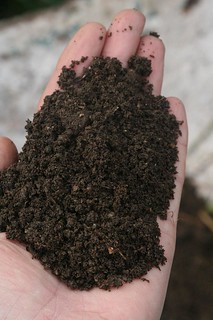
Compost. (Photo credit: wisemandarine)
Few gardeners are blessed with an abundant supply of beautiful, rich topsoil. Depending on where you live, you may find yourself struggling with heavy clay, rocky, sandy or other less-than-ideal soil conditions.

Each of these soil types presents different challenges ranging from retaining too much water (or not enough) to being devoid of the essential nutrients plants need to survive and thrive. For example, if you have heavy clay soil and you just dig a hole in the ground and drop a plant into it, chances are good that plant won’t make it. The heavy clay around your plant will act like a bathtub whenever it rains, which means your plant will be forced to sit in a pool of water with nowhere to drain.

So your first step will be to identify the type of soil you have so you can take the appropriate steps to amend it. Once you know what you are dealing with, you’ll be able to determine which specific amendments are needed to make your type of soil a hospitable place for your vegetable garden. Be sure to choose organic and naturally occurring substances to keep your veggies chemical-free and healthy for you to eat!

Cucumber plant climbing up the trellis.
Cucumber plant climbing up the trellis. (Photo credit: Wikipedia)
Tip #2: Grow UP.  

Whenever possible, make sure you take advantage of vertical space in your garden by utilizing fences, trellises, and other structures to keep your plants off the ground.

There are many advantages to growing your vegetables vertically. For starters, you can grow more food in a smaller area, which is great for urban gardens or those with limited growing space. Plus, growing vegetables on structural supports makes harvesting and weeding around your plants a lot easier. This is especially true for older individuals or those with other physical restrictions because less bending and stretching is required to perform these tasks.

Growing vertically benefits your vegetable plants, too.  Raising the plants off the ground leads to better air circulation around them, which is associated with fewer fungal infections and pest infestations.

Tip #3: Give Your Plants Some Friends. 

Companion planting is a smart way to increase the yield of your vegetable garden, and is a common practice among most organic and sustainable gardeners.  Learning which plants work well together is an important step towards maximizing the efficiency of your vegetable garden.

Gelbe Rüben und Zwiebeln in Mischkultur; Compa...
Companion planting of carrots and onions (Photo credit: Wikipedia)
Some plants are particularly beneficial to one another, so it makes sense to group these plants together in your garden. These beneficial plant combinations may add needed nutrients to the soil, deter unwanted pests or attract beneficial insects into your garden.

You may have heard how Native Americans planted “the three sisters” – maize (corn), beans and squash – together because each plant benefited the others in some way.  For example, the corn stalks provided structure for the beans to grow upon, while the squash provided an effective weed barrier as it spread out along the ground.

Vegetable gardening is an acquired skill that evolves over time. However, applying these 3 must-know vegetable gardening tips will lessen your learning curve significantly.

Enhanced by Zemanta

Wednesday, May 21, 2014

How to Decide When to Plant Vegetables in Your Area

Figuring out when to plant vegetables in your area requires a little detective work. In addition to your geographic location, you’ll need to consider a few other variables, as well. For example, the type of vegetables you plan to grow and how you intend to plant them (seedlings, transplants or seeds) will factor into when you should get your crops in the ground, as well.

If you live in an area with distinct seasons, your vegetable growing season will fall loosely between your anticipated frost-free date in the spring and the first hard frost in the fall. Unless you have a crystal ball, it is next to impossible to predict these dates with absolute certainty. 

Fortunately, there are some valuable online resources you can check for general guidelines. A quick online search for “frost-free date” + your geographic area should give you a good idea of when it might be safe to plant in your region.

A tray used in horticulture (for sowing and ta...
Starting seeds indoors for an earlier start. (Photo credit: Wikipedia)
Of course, the published frost-free date for your area doesn’t take into account unexpected late season snow storms or unseasonably cold temperatures. However, if you wait until after the expected frost-free date for your area AND for the daytime soil temperature to reach 65 degrees or warmer, you should be in good shape. If you want to warm up your soil faster, you can cover your planting beds with dark plastic sheets for several weeks prior to planting.

As you develop your garden planting timeline, think of these two important dates as virtual “bookends” around your prime vegetable growing season. However, if you start seeds indoors or protect your plants from cold temperatures with mulch, cold frames, row covers or mini-hoop houses, you can extend your growing season even further. 

Don’t Ignore “Days to Maturity” for Your Selected Plants

As you’re deciding when to plant vegetables in your garden, pay close attention the “days to maturity” information noted on the seed packages or plant markers for the vegetables you’ve selected. This number, which is often expressed as a range of days, tells you how long it will take until that plant is ready to harvest.

Lettuce in raised beds with hoops
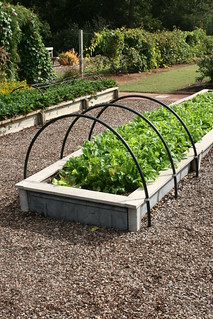
Lettuce in raised beds with hoops (Photo credit: Gardening in a Minute)
This is important to know because some vegetables reach maturity much faster than others. For example, radishes, lettuce and baby carrots may be ready for harvest just 30 days after they are sown as seeds. On the other hand, some pumpkin varieties can take a full 120 – 160 days before they reach maturity. 

The “days to maturity” for a particular vegetable variety gives you an idea of how early you need to get that plant into the ground if you want it to reach maturity before your first hard frost date. 

It also tells you how late in the season you can plant certain crops. For example, you can’t wait until late summer in northern climates to plant pumpkins seeds that require 160 days to mature. On the other hand, you can plant fast-growing lettuce varieties with confidence until 30 days or so before your expected last frost date.  

Learning when to plant vegetables in your area is worth the effort. Knowing when your prime growing season begins and ends – and how you can get the most out of it – will make you a much more successful food gardener. It will help you decide which vegetables to grow and how to help those varieties thrive in your garden.

We will be on vacation next week, so will not be posting, but be sure to check back the following week when we'll share 3 important tips that vegetable gardeners need to keep in mind for a successful organic gardening experience!  Have a Happy Memorial Day, and enjoy your beautiful early summer garden!

Enhanced by Zemanta

Wednesday, May 14, 2014

Planting A Wildflower Garden - Part 2: Choosing Flowers to Plant

Now that your spot is prepared, what types of wildflowers should you plant? You may want to come up with a theme or a certain group of species, or go with what time frames you want your flowers to bloom in. For example, I think it would be a rather nice plan to have a wild-flower garden with a succession of blooms from early spring to late fall.

Let us start off with March, the hepatica, spring beauty and saxifrage. Then comes April bearing in its arms the beautiful columbine, the tiny bluets and wild geranium. For May there are the dog-tooth violet and the wood anemone, false Solomon's seal, Jack-in-the-pulpit, wake robin, bloodroot and violets. June will give the bellflower, mullein, bee balm and foxglove. I would choose the gay butterfly weed for July. Let turtle head, aster, Joe Pye weed, and Queen Anne's lace make the rest of the season brilliant until frost.

Let us talk a bit about the likes and dislikes of a few of these plants. After you get started you can keep on adding to this wild-flower list on your own as you discover what plants grow well in your area and how they like to be treated.

Hepatica nobilis. Purple form. Français : Form...
Hepatica nobilis. Purple form. (Photo credit: Wikipedia)
There is no one who doesn't love the hepatica. Before the spring has really decided to come, this little flower pokes its head up and puts all else to shame. Tucked under a covering of dry leaves the blossoms wait for a ray of warm sunshine to bring them out. These embryo flowers are further protected by a fuzzy covering. This reminds one of a similar protective covering which new fern leaves have. In the spring a hepatica plant wastes no time on getting a new suit of leaves. It makes its old ones do until the blossom has had its day.

You will find hepaticas growing in clusters, sort of family groups. They are likely to be found in rather open places in the woods. The soil is usually rich and loose. So these should go only in partly shaded places and under good soil conditions. If planted with other woods specimens, give them the benefit of a rather exposed position, that they may catch the early spring sunshine. I should cover hepaticas over with a light layer of leaves in the fall. During the last days of February, unless the weather is extreme, take this leaf covering away. You'll find the hepatica blossoms all ready to poke up their heads and bloom!

The Spring Beauty hardly allows the hepatica to get ahead of her. With a white flower which has dainty tracings of pink, a thin, wiry stem, and narrow, grass-like leaves, this spring flower cannot be mistaken. You will find spring beauties growing in great patches in rather open places. Plant a number of the roots and allow the sun good opportunity to get at them, for this plant loves the sun.

The other March flower mentioned is the saxifrage. This belongs in quite a different sort of environment. It is a plant which grows in dry and rocky places. Often one will find it in chinks of rock. There is an old tale to the effect that the saxifrage roots twine about rocks and work their way into them so that the rock itself splits. It is often found in dry, sandy places right on the borders of a big rock. It has white flower clusters borne on hairy stems.

The columbine is another plant that is quite likely to be found in rocky places. The nodding red heads bob on wiry, slender stems. The roots do not strike deeply into the soil; in fact, often the soil hardly covers them. Now, just because the columbine has little soil, it does not signify that it is indifferent to the soil conditions. For it always has lived, and always should live, under good drainage conditions. I wonder if it has struck you how really hygienic plants are? Plenty of fresh air, proper drainage, and good food are fundamentals for plants and for humans!

It is evident from study of these plants how easy it is to find out what plants like. After studying their feelings,  do not make the mistake of huddling them all together under poor drainage conditions.

English: This is a small patch of Tiny Bluets ...
A small patch of Tiny Bluets (Houstonia sp.). (Photo credit: Wikipedia)
I always have a feeling of personal affection for the bluets. When they come I always feel that now things are beginning to settle down for the summer. They start with rich, lovely, little delicate blue blossoms. As June gets hotter and hotter their colour fades a bit, until at times they look quite worn and white. Some people call them Quaker ladies, others Innocence. Under any name they are charming. They grow in colonies, sometimes in sunny fields, sometimes by the road-side. From this we learn that they are more particular about the open sunlight than about the soil.

If you desire a flower to pick and use for bouquets, then the wild geranium is not your flower. It droops very quickly after picking and almost immediately drops its petals. But the purplish flowers are showy, and the leaves, while rather coarse, are deeply cut. This latter effect gives a certain boldness to the plant that is quite attractive. The plant is found in rather moist, partly shaded portions of the woods. I like this plant in the garden. It adds good color as long as blooming time lasts.

There are lots of wild flowers I might have suggested, and I won't go through the rest of the season's list here. These I have mentioned were not given for the purpose of a flower guide, but with one intent: to demonstrate the importance of understanding how to study soil conditions for the work of starting a wild-flower garden.

If you are still uncertain, just take one or two flowers and study just what you selected and where they like to grow, and then see how they do in your garden. Once you've seen how these few do, you can add more variety to your garden next year. Enjoy the learning process, and your beautiful wildflower garden!

Enhanced by Zemanta

Wednesday, May 7, 2014

Planting A Wildflower Garden: Part 1 - Preparing Your Spot

A wild-flower garden has a most attractive sound. One thinks of long tramps in the woods, collecting material, and then of the fun in fixing up a real wild garden.

Many people say they have no luck at all with such a garden. However, it is not a question of luck, but a question of understanding, for wild flowers are like people and each has its personality. What a plant has been accustomed to in nature it desires always. In fact, when removed from its own sort of living conditions, it sickens and dies. That is enough to tell us that we should copy Nature herself.

When you are hunting wild flowers, as you choose certain flowers from the woods, notice the soil they are in, the place, conditions, the surroundings, and the neighbours.

Lacy Phacelia (Phacelia tanacetifolia) - geogr...
Wildflowers. (Photo credit: Wikipedia)
Suppose you find dog-tooth violets and wind-flowers growing near together. Then place them so in your own new garden. Suppose you find a certain violet enjoying an open area - then it should have the same in your garden. If you wish wild flowers to grow in a tame garden, you must make them feel at home - and that means you need to trick them into almost believing that they are still in their native haunts.

Wild flowers ought to be transplanted after blossoming is over. Take a trowel and a basket into the woods with you. As you take up a few, a columbine, or a hepatica, be sure to take with the roots some of the plant's own soil, which must be packed about it when replanted.

The bed into which these plants are to go should be prepared carefully before you obtain your plants. It is not a good idea to bring those plants back and let them sit over a day or night before planting. They should go into their new quarters at once. The bed needs soil from the woods, deep and rich and full of leaf mold. The drainage system should be excellent. Some people think that all wood plants should have a soil saturated with water. But the woods themselves are not water-logged. If you have heavy, wet soil, you may need to put in some extra work, and dig your garden up very deeply and put some stone in the bottom. Then replace the soil. And on top, where the top soil once was, put a new layer of the rich soil you brought from the woods.

Before planting, water the soil well. Then as you make places for the plants, put into each hole some of the soil which belongs to the plant which is to be put there.

Once your bed is prepared, you are ready to collect plants to fill it, and build your beautiful new wildflower garden!

Be sure to check back next week when we will share some ideas and suggestions for what flowers to plant, and how to choose the right ones for your wildflower garden.


Enhanced by Zemanta