Thursday, April 29, 2010

Preparing Your Soil for Planting

Good evening, and welcome back!

We are continuing through our step-by-step guide to starting your own sustainable garden.

In this lesson, we are going to cover some helpful information about soil types, and preparing your garden soil for planting.

Soil types
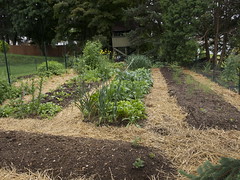
Image via WikipediaIdentifying Types of Soil
If you’re getting ready to go on a new garden venture, you need to prepare your soil to ideally house your plants. The best thing you can do in the soil preparation process is to build the perfect mixture of sand, silt, and clay. Preferably (for most garden plant types) there would be 40 percent sand, 40 percent silt, and 20 percent clay.

Sand: Dirt primarily had its start from crumbled rock together with animal and vegetable decay. Friction from rocks colliding and grinding together, combined with great changes in temperature, and the water and the gases in the atmosphere helped in the crumbling process. From this action of mechanical rubbing, it is easy to understand how sand was formed. This represents one of the main divisions of soil.

However, if soil were nothing but broken rock masses then indeed it would be very poor and unproductive. But the early forms of animal and vegetable life decaying became a part of the rock mass and a better soil resulted. So the soils we speak of as sandy soils typically have mixed with the sand other matter, sometimes clay, sometimes vegetable matter or humus, and often animal waste.

Clay: This brings us to another class of soils. It happens that certain portions of rock masses became dissolved when they were worked upon by water and gases in the environment. This dissolution took place largely because of a certain gas in the atmosphere called carbon dioxide or carbonic acid gas. This gas attacks and changes certain substances in rocks, turning parts of them into a new substance, which we call clay. A change like this is not mechanical but chemical. The clay soils are often called mud soils because of the amount of water used in their formation.

Testing Your Soil
There are several easy tests used by experienced gardeners to tell whether the soil has a good composition. First you can squeeze it in your hand. If it doesn’t hold its shape and crumbles without any outside force, your sand ratio is probably a little high. If you poke the compressed ball with your finger and it doesn’t fall apart easily, your soil contains too much clay.

If you’re still not sure about the makeup of your soil, you can separate each ingredient by using this easy method. Put a cup or two of dirt into a jar of water. Shake the water up until the soil is suspended, then let it set until you see it separate into 3 separate layers. The top layer is clay, the next is silt, and on the bottom is sand. Using this method, you should be able to guess the percentage of each component within your dirt fairly accurately, and act accordingly. Soil profile 236x288 38.76 KBImage via Wikipedia

After you’ve analyzed the makeup of your soil, if you decide that it is low on a certain ingredient then you should definitely do something to fix it. If dealing with too much silt or sand, it’s best to add some peat moss or compost. If you’ve got too much clay, add a mixture of peat moss and sand. The peat moss, when moistens, helps for the new ingredient to infiltrate the mixture better. If you can’t seem to manage to attain a proper mixture, just head down to your local gardening store. You should be able to find some kind of product to aid you.

Preparing Your Garden Soil for Planting
New garden spots are likely to be found in one of two conditions: they are covered either with sod or with rubbish. In large garden areas the ground can be ploughed and the sod turned under; but in small gardens you will need to remove the sod.

Removing Sod: Stake and line off the garden spot, using string or fine twine, or even straight planks laid along the ground between the stakes. The line gives an accurate and straight course to follow. Cut the edges with the spade all along the line. If the area is a small one, this is an easy matter. Such a narrow strip may be marked off like a checkerboard, the turf cut through with the spade, and easily removed. This could also be done in two long strips cut lengthwise of the strip. When the turf is cut through, roll it right up like a roll of carpet.

But suppose the garden plot is large? The best way is to divide this up into strips a foot wide and take off the sod as before.

What should you do with the sod? Do not throw it away for it is full of nutrients, although not quite in usable form yet. Pack the sod grass side down one square on another. Leave it to rot and to weather — when rotted it will make a fine fertilizer. Such a pile of rotting vegetable matter is called a compost pile. All through the summertime you can add any old green vegetable matter to this pile, as well as grass clippings. In the fall, throw the autumn leaves on. This will be a great addition to your garden next season! (More on composting in a future blog post.)

The water content of the soil is another significant thing to think about when preparing your garden space. If your garden is at the bottom of an incline, it is most likely going to absorb too much water and drown out the plants. If this is the case, you should probably elevate your garden a few inches (4 or 5) over the rest of the ground (see last lesson on raised beds). This will allow for more drainage and less saturation.

You will want to make sure to spade and rake your soil well before planting, to break up large lumps of soil and provide a proper environment for new seeds to grow in. (For some good garden tools that we recommend, you can visit our main website at: www.newholisticliving.com/sustainablegardening.html)

Adding nutrients to your soil is also a vital part of the process, as most urban soils have very little nutrients in them naturally, especially if they have never been gardened before. One to two weeks prior to planting, you should add a good amount of compost or other natural fertilizer to your garden (we like very well-composted chicken manure!). Mix it in really well and let it sit for a while (at least 2 weeks if possible). Once you have done this, your soil will be completely ready for whatever seeds you may plant in it.

Once your seeds are planted, you still want to pay attention to the soil. The first few weeks, the seeds are desperately using up all the nutrients around them to sprout into a real plant. If they run out of food, how are they supposed to grow? About a week after planting, you should add the same amount of fertilizer that you added before. After this you should continue to use fertilizer, but not as often. If you add a tiny bit every couple of weeks, that should be plenty to keep your garden thriving. (A good natural liquid fertilizer that you can make yourself is compost tea, but you can find others at your local garden store — just make sure to check the ingredients for harmful chemicals to avoid!) Top-dressing with compost is also fine — just make sure it is well-composted, and leave a bit of space around the stems of the plants to avoid burning the leaves if the compost is very rich.

Basically, the entire process of soil care can be compressed into just several steps: verify that the makeup of the soil is satisfactory, make sure you have proper drainage in your garden, add fertilizer before and after planting, then add fertilizer regularly after that. Follow these simple steps, and you’ll have a surplus of healthy plants in no time. And if you need any more details on an individual step, just go to your local nursery and inquire there. Most of the employees will be more than happy to give you advice.

You can also find some very helpful resources, as well as sign up for our free weekly sustainable gardening newsletter at www.newholisticliving.com/sustainablegardening.html.

Stay tuned for our next blog on choosing healthy plants for your new garden!
Ciao!
Rose
Enhanced by Zemanta

Friday, April 16, 2010

Improving Your Garden with Raised Beds

Good morning!

I hope you are enjoying the sustainable gardening series so far. We will be covering some juicy topics soon, but today we are throwing in a special bonus that may prove extremely helpful in your gardening efforts!

Since we’ve just covered landscape design, there is one important element that can really make an impact on the success of your garden. Here it is:

Creating Raised Beds Raised Bed GardenImage by VeggieGardeningTips via Flickr
If your current planting goals involve plants that require good water drainage, I am sure you know how frustrating it is to have a yard that just won’t cooperate. Some plants can handle the extra water that comes about from being in an area that doesn’t drain properly. In fact, it might just cause them to bloom more lushly. However, other plants don’t cope as well, and it could cause them to die a gruesome, bloated death. You should always find out about the drainage required for every plant you buy, and make sure that it won’t conflict with any of the areas you are considering planting it in.

To test how much water your designated patch of soil will retain, dig a hole approximately ten inches deep. Fill it with water, and come back in a day when all the water had disappeared. Fill it back up again. If the second hole full of water isn’t gone in 10 hours, your soil has a low saturation point. This means that when water soaks into it, it will stick around for a long time before dissipating. This is unacceptable for almost any plant, and you are going to have to do something to remedy it if you want your plants to survive. (This is most usually a problem in very heavy, clay-type soils.)

One great (and relatively easy) method for improving drainage in your garden is to create a raised bed. This involves creating a border for a small bed, and adding enough soil and compost to it to raise it above the rest of the yard by at least 5 inches. You’ll be amazed at how much your water drainage will be improved by this small modification. If you’re planning to build a raised bed, your prospective area may either lie on grass or on dirt. For each of these situations, you should build it slightly differently.

If you want to start a raised garden in a non grassy area, you won’t have much trouble. Just find some sort of border to contain the dirt you will be adding. I’ve found that there is nothing that works quite as well as a few two-by-fours. After you’ve created the wall, you must put in the proper amount soil and manure or compost. Depending on how long you plan to wait before planting, you will want to correct the ratio to allow for any deteriorating that may occur.

If you’re trying to install a raised bed where sod already exists, you will have a slightly more difficult time. You will need to cut the turf around the perimeter of the garden, and flip it over. This may sound simple, but you will need something with a very sharp edge to slice the edges of the sod and get under it. Once you have turned it all upside down, it is best to add a bed of straw to discourage the grass from growing back up. After the layer of straw, simply add all the soil and manure that a normal garden would need.

Raised bed of lettuce, tomatoes, 6 different t...Image via WikipediaPlanting your plants in your new area shouldn’t pose much difficulty. It is basically the same process as your usual planting session. Just be sure that the roots don’t extend too far into the original ground level. The whole point of creating the raised bed is to keep the roots from growing way down in the soil which stays oversaturated. Keep your garden properly watered, and you shouldn’t have too many problems.

Once you have plants in your new bed, you’ll notice an almost immediate improvement. The added soil facilitates better root development. At the same time, evaporation is prevented and rot is discouraged. All of these things added together makes for an ideal environment for almost any plant to grow in. So don’t be intimidated by the thought of adjusting the very topography of your yard. It is a simple process as I’m sure you’ve realized, and the long term results are worth every second of work.

Be sure to stay tuned for our next blog, when we’ll cover the proper soil preparation methods to make sure your new plants grow optimally and stay healthy!

Rose.

P.S. To learn more about starting your own sustainable garden, please visit http://www.newholisticliving.com/sustainablegardening.html.
Enhanced by Zemanta

Tuesday, April 13, 2010

3 Garden Landscaping Tips

Welcome back!

We are continuing through a 4-week step-by-step guide to starting your own sustainable garden.

This week, we are going to cover some landscaping options for your new garden.

3 Tips for Landscaping your Garden
Landscaping is usually a fairly big task, consuming much time and energy. But before you hire that professional, here are some tips that could save both time and money.

1. Spend some time thinking about exactly how you want the final design to look. You need to take account of the style and function of your general space. Do you want to include an area for entertaining in the same space? Is there to be an area for children to play, a fishpond or a pool? If so, you will want to be sure to plan good “buffer zones” to avoid harm to sensitive plants. An idea of the plants you want to be there will also help. Focus on the area where you spend most of your time. That’s a good place to start.

Hybrid Musk rose 'Moonlight'Image via WikipediaA good place for a flower garden is generally at the side or rear of the house. The flower garden may be laid out formally in neat little beds, or it may be more of a careless, hit-or-miss sort. Both have their good points.

Great masses of blooms can be lovely, but you should have in mind some feeling of the blending of color. Nature appears not to consider this at all, and still gets wondrous effects. This is because of the tremendous amount of her perfect background of green, and the limitlessness of her space, while we are confined at the best to comparatively contained areas. So we should endeavor not to blind the eyes with clashes of colors which do not blend well at close range. (In order to break up extremes of colors you can always use multitudes of white flowers, or something green like mignonette.)

2. The style of your home must be taken into account. If you have a rural cottage, formal gardens surrounding it could look out of place.

In terms of landscaping a garden that runs alongside your house or other building, a building often needs the help of vines or flowers or both to tie it to the grounds in such a way as to form a harmonious whole. Vines lend themselves well to this work. It is often best to plant a perennial vine, and so let it form a lasting part of your landscape scheme. The Virginia creeper, wisteria, honeysuckle, a climbing rose, the clematis and trumpet vine are all very satisfactory for this use.

Of course, the morning-glory is an annual vine, as is the moon-vine and wild cucumber, and these work as well, if you just want a temporary cover, while on an old fence a hop vine is a thing of beauty.

Flowers may go well along the side of the building, or bordering a walk. What Retaining wall covered by vinesImage via Wikipedialovelier in early spring than a bed of daffodils close to the house? Hyacinths and tulips, too, form a blaze of glory. Bulbs such as these are little or no bother, and start the spring off in a lovely way.

3. Think also about your lifestyle. Do you want to spend hours caring for many beds of annuals or pruning beds of roses? If so, go ahead and plant them, but if you’d rather spend your free time at the beach, then go for an easy-care garden and landscape, as discussed in our recent newsletter on plant choice.

Here are some different landscape styles you can choose for your own garden:

a. Formal. This style uses lots of straight lines and perfect geometrical shapes. Orderly arrangement of plants instead of random positioning is employed. Close arrangement and pruning is seen on many landscaped gardens with this style.

b. Informal. This kind of landscape gardening works well with cozy cottages. Beds with curved edges instead of straight lines and random placement of plants suit this landscape style.

c. English Garden. This style emphasizes the harmony between the house's architecture and the garden.

d. Formal/Informal Garden. This style often comes with a brick walkway that exudes formality. This walkway leads to the rear with a circle of plants. The organization of plants resembles the English garden style but it has no formal borders.

e. Oriental. This is often the kind of garden found in small backyards. It often uses lots of rocks, evergreens and water. A wide variety of plants create several interesting angles with this style.

f. Woodland. This landscaping suits a house that has a wooded backyard and sloping ground. It is more wild and unruly, but can look quite sensational if done well.

HochbeetImage via WikipediaA Note on Paths:
As far as paths go in general, keep this in mind: a path should always lead somewhere. That is its business — to direct one to a definite place. Straight, even paths are not unpleasing if the effect is to be that of a formal garden. The danger in the curved path is an abrupt curve, or an uneven effect. It can be better for you to stick to straight paths, unless you can make a really beautiful curve.

Garden paths may be of gravel, of dirt, or of grass. One sees grass paths in some very lovely gardens. I doubt, however, if they would serve as well in your small gardens. Small garden areas are so limited that they should be re-spaded each season, and the grass paths are a great bother in this work.

Of course, a gravel path makes a fine appearance, but again you may not have gravel at your command.

If you have the space and will not be re-digging your paths each year, it may be a good idea to put in semi-permanent paths. It’s a bit of work, but offers good and lasting results. To do this, you would scoop out the path for about two feet in depth. Then put in six inches of stone or clinker. Over this, fill in the dirt, rounding it slightly toward the center of the path. There should never be depressions through the central part of paths, since these form convenient places for water to stand. The under layer of stone in this method makes a natural drainage system.

So there you have some choices for your landscaping.

Next time, we’ll be discussing raised beds, which can be a great way to make even a troublesome garden much more successful. You especially won’t want to miss this if you have a poorly drained area, or difficult soil.

So be sure to check back shortly for the next post!
Rose.

P.S. For more resources to help make your own sustainable garden the best it can be, please visit http://www.newholisticliving.com/sustainablegardening.html. You can also subscribe to our free Sustainable Gardening Newsletter, and get these lessons delivered directly to your inbox!
Enhanced by Zemanta

Saturday, April 10, 2010

Choosing the Ideal Location for Your Garden

Welcome back!

Here is the next installment in our “starting your own sustainable garden” series.

Once you have chosen what type of garden you want, there are many other factors you need to decide before you actually get to work with your gardening tools. Mainly you need to pick out its location. This is usually decided by several factors, including how you will water it, how much space you have, how much shade vs. sun it needs, etc. Some of these questions can be very important in deciding whether your garden lives or dies, so don’t take them lightly. You need to take each one into special consideration.

Sun vs. Shade
Choosing the garden’s location within your yard is one of the most important things to decide. You want to choose a position that will provide an ideal climate for the plants you wish to grow. I don’t know what type of garden you’re dealing with so I can’t give you specific advice, but if you do a Google search for the plant you’re dealing with then you’ll find a plethora of sites informing you about the perfect conditions for its growing. After this, it’s just a issue of finding the most shaded or most sunny spot in your garden spot.

The greatest determining factor is the sun. For example, most gardens would not work well in a north-facing area; while north corners do work for ferns, certain wild flowers, and begonias, they are of little use as spots for most other types of garden plants.

If possible, the ideal spot (for plants preferring a good deal of sun) has a southern exposure. Here the sun will provide warmth all day long. When the garden is thus located, the rows of vegetables and flowers should run north and south. Thus placed, the plants receive the sun’s rays all the morning on the eastern side, and all the afternoon on the western side. One will most likely not have any lopsided plants with such an arrangement.

But suppose the garden faces southeast? In this case, in order to get the best distribution of sunlight, you should run the rows northwest and southeast.

The idea is to get the most sunlight as evenly distributed as possible for the longest period of time. From the lopsided growth of window plants it is easy enough to see the effect on plants of badly distributed light. So if you use a little diagram remembering that you wish the sun to shine part of the day on one side of the plants and part on the other, you can plan out your garden layout ahead of time.

The southern exposure is best because the sun gives fairly even treatment to each side. A northern exposure could in some cases mean an almost entire cut-off from sunlight; while northeastern and southwestern places pretty much always get uneven distribution of sun’s rays, no matter how carefully this is planned.

This is a Japanese garden which is located in ...Image via WikipediaIf your plants prefer a shadier location, getting the perfect amount of shade for your garden can be a difficult endeavor. Once you have a basic idea for where you want your garden, you might want to watch it and record how many hours it spends in sun and how many it spends in shade. Compare your findings with an online search, and you should be able to determine whether the spot you chose is ideal or not for planting your desired garden. Of course the amount of sun vs. shade will change as the seasons change, but if you try to watch this as close to your planting season as possible, you should get a good estimate. If necessary, later on you can put up some kind of shade to protect your garden from getting too much sun.

Watering
Another deciding factor is how you plan to water your garden. If you have a sprinkler system already installed for your grass, then it might be a good idea to put your garden in the middle of your yard. Then it will get watered at the same time, and require no extra work from your part. But if this isn’t really the best location for your garden, then you might end up watering it by hose or dragging a sprinkler out there. In this case, just make sure your garden is within the ideal distance for a hose to reach. While this might not seem like the best factor to base the entire location of your garden on, you’ll be surprised at how nice it is to plan this out in advance, rather than finding out later the hard way, that your garden is quite difficult to get water to.

After you’ve determined the ideal place (and space) for your garden and whether it has the right amount of sunlight, and whether you will be able to handily water it, you’re one step closer to actually starting your garden. Of course there are other factors that I have overlooked here, but we will cover some of these in upcoming issues.

If possible, you should plan your garden out on paper ahead of time. The plan is a great help when the real planting time comes. It saves time and unnecessary buying of seed.

Have fun planning, and keep your eye out for our next newsletter, where we will discuss the different landscaping options for your new garden spot!

For more resources to help make your own sustainable garden, you can also visit our website at http://www.newholisticliving.com/sustainablegardening.html.

Stop back again soon, as next time we will be discussing different options for landscaping your new garden!
Rose.
Enhanced by Zemanta

Saturday, April 3, 2010

Step One: What Type of Garden Do You Want?

Welcome back to our gardening series!

This article is the second in a series designed to help those interested in starting your own sustainable garden. Whether you are working with limited space, or have a large area available, whether you are interested in fruit, vegetables, or flowers, I hope you will find these tips helpful.

This week we are going to cover the first step in the process:

A flower picture taken in my own gardenImage via WikipediaDecide What Type Of Garden You Want
If you’re thinking about starting a garden, the first thing you need to consider is what type of garden you want. There are many different choices and often it can be hard to pick just one, but hopefully these tips can help narrow it down. By narrowing it down, you’ll make the gardening experience easier on both yourself and the plants. If all your plants are similar in type, then it shouldn’t be very hard to care for them all. So here are some of the main garden ideas for you to choose from.

Flowers
If you’re just looking for something to look pretty in your yard, you may want to consider want a flower garden. There are a couple of different families of flowers available for your new garden. Perennial flowers are flowers which come back year after year. Different areas and climates have different flowers which are considered perennials.

Annuals are flowers which must be planted every year — usually in the spring, although this also will depend on your climate and location.

If you do a quick internet search for your area, you can probably find a list of flowers that will bring your new garden to life. Flowers are generally fairly easy to grow, since they often require the most work in the planting stage – after that, they usually can take care of themselves to some extent.

Vegetables
Another choice for your new garden is a vegetable garden. These usually require a TomatoImage via Wikipedialittle more work and research than a flower garden, but can be much more rewarding, as they can help you put food on the table! Depending on your climate, you may be able to produce vegetables in your garden for most of the year.

When starting a vegetable garden, you should build it with the thought in mind that you will be adding more types of veggies in later. This will help your expandability. Once all your current crops are out of season, you can rotate in new and different crops. This type of planning works very well for those with limited garden space. A vegetable garden is ideal for someone who wants some produce, but doesn’t want to devote every waking hour to perfecting their garden (see below.)

Fruit
One of the more difficult types of gardens to manage is a fruit garden or orchard. It’s definitely the most high-maintenance! When growing fruits, many more pests will be attracted due to the sweetness of the fruit. You’ll not only have to deal with having just the right dirt and fertilizer, you have to deal with choosing natural pesticides which won’t pose a health-risk to those eating the fruit.

Your fruit garden will probably not produce fruit year-round. The soil needs to be just right for the plants to grow, and putting in another crop during its off-season could be difficult, or even disastrous to its growth process. But if you’re willing to put lots of work into maintaining a garden which gives sweet rewards, then a fruit garden could be a good choice for you.

So now that I’ve outlined some of the main garden types that people choose, it’s time to spend a little time considering your decision. Basically, the garden type comes down to what you want to get out of it, and how much work you want to put into it. If you’re looking for a lovely looking garden with little work, go with a flower garden.

If you want to grow lots of delicious produce, and are willing to put in more time and effort, then go for a vegetable or fruit garden.

Just be sure this is something that you are going to enjoy doing — otherwise, it won’t be worth it for you to put in the effort involved.

In the next article in this series, we will discuss how to choose the best location for your new garden.

And as always, you can find more sustainable gardening tips and resources on our main website at http://www.newholisticliving.com/sustainablegardening.html.

See you next time!
Rose.
Enhanced by Zemanta

Friday, March 26, 2010

Welcome to Spring! New Gardening Series…

Hurray! At long last, after a record-breaking cold and snowy winter (in many locations), spring has arrived!

I realize things have been a bit slow on the blogging front lately, and I apologize. Thanks for hanging in there! We’ve been plugging away getting some new and exciting things going on on our website, and now I plan to catch up on the blog here.

Speaking of which, in honor of this wonderful season, I will be posting a new series on starting your own sustainable garden over the next few weeks.

This series is mostly designed for the new gardener, but we will also get into some more advanced stuff as the weeks progress (such as composting, organic pest control, and more). So be sure to check back and see what’s new, even if the early posts are a bit elementary for some of you!

Our first topic is a bit on the philosophical side, but hopefully will put you in the right frame of mind to begin your own gardening odyssey!

Why Do We Garden?
I don’t know what it is about a garden that has always drawn humans to them. But they’ve always been very popular, and an valued part of peoples’ lives. Most religions feature gardens as the settings for some of the most important events. According to Christianity, humanity was started in a garden and the son of God was resurrected in a garden. The Buddhists build gardens to allow nature to permeate their surroundings. Almost every major palace and government building has a garden. But what’s so great about them? They’re just a bunch of plants, after all, right?
  Gardener GardeningImage via Wikipedia

Of course, the reasoning is fairly obvious behind why people grow food in gardens. It’s to eat! If you live off the fat of the land and really survive mostly or even partially on stuff from your garden, it’s easy to understand the reasoning. But what about those people who plant flower gardens just for the sake of looking nice? There’s no immediate benefit that I can see; you just have a bunch of flowers in your yard! However, after thinking extensively about the motive behind planting decorative gardens, I’ve come up with several possible ideas.

I think one of the reasons people love gardens so much is that while we have a instinctive desire to progress and industrialize, deep inside all of us is a primal love for nature. While this desire might not be as strong as the desire for a modern lifestyle, it is still strong enough to compel us to create gardens, small oases of nature, in the midst of all our hustle and bustle.

Being in nature feels like regressing to an earlier (and simpler) stage of humanity, and in a garden, we too can escape to a time of comfort and utter happiness. This is why gardens are so relaxing and calming to be in. This is why gardens are a such good place to meditate and do tai chi exercises. A garden is a way to quickly escape from the busy world.

I’ve thought at times that perhaps we as humans feel a sort of responsible guilt driving us to restore nature and care for it. This guilt could stem from the knowledge that we, not personally but as a race, have destroyed so much of the natural world to get where we are today. It’s the least we can do to build a small garden in remembrance of all the plants we kill every day. It’s my theory that this is an underlying reason why many people to take up gardening as a hobby.

Gardening is definitely a healthy habit though, don’t get me wrong. Any hobby that provides physical exercise, helps the environment, and improves your diet can’t be a negative thing. So no matter what the underlying psychological cause for gardening is, I think that everyone should continue to do it. In the USA especially, which is dealing with obesity and pollution as its two major problems, I think gardening can only serve to improve the state of the world.

Of course I’m no psychologist; I’m just a curious gardener. I’ve often wondered what draws me to the garden…. What is it that makes me go outside for a few hours every day (or whenever possible!) with my gardening tools, and facilitate the small-time growth of plants that would grow naturally on their own? I may never know, but in this case ignorance really is bliss.

So how do you go about starting your own garden, especially if you barely know a hoe from a trowel?

Over the next few weeks, I will provide a step-by-step guide to starting your own garden. Whether you are working with limited space, or have a large area available, whether you are interested in fruit, vegetables, or flowers, I hope you will find these tips helpful.

Keep your eye out for the next post, to learn about the first step to starting your own sustainable garden!

In the meantime, you can always find sustainable gardening tips and resources on our main website at http://www.newholisticliving.com/sustainablegardening.html.

Thanks to all of you who have visited through the past few slow months, and we appreciate each and every one of you! As always, we’d love your comments and feedback, so feel free to post!

See you next time!
Rose.
Enhanced by Zemanta

Sunday, August 2, 2009

Community Supported Agriculture: A Win-Win-Win Concept

It’s my second year participating in a community supported agriculture program, and I am hooked!

Last year, I loved my CSA so much that I joined two this year! I am splitting them with a couple I know who was also interested, and I’m glad, because I am single, and though I love vegetables, I am practically overwhelmed, even after dividing both of my shares in half!

CSA shareImage via WikipediaI’ve been interested in the CSA concept for years. It seems like such an amazingly common-sense, yet innovative idea. You get fresh, healthy, locally grown (and often organic) foods, often at a lower price than what you would find at the supermarket. The farmer gets a built-in market, and usually they get paid at the beginning of the season, when they need it most. And you are helping out the environment by eating locally grown rather than having foods shipped in from other areas (or even other countries), as well as supporting small farms that tend to operate more sustainably and take better care of the soil & water they use.

The problem was, I didn’t know how to find a CSA, or if there even were any in my area. I searched online a few times several years ago, but didn’t have much luck. But in the few years since then, the farming community has embraced the use of the internet, and many farms now have their own websites, which makes it much easier to find participating programs. There are at least 5 or 6 CSAs that deliver locally to my hometown now, and several others in outlying areas in the vicinity.

I’ve told many friends about it, and for the general public, the community supported agriculture concept seems to be a well-kept secret. For those who are unfamiliar with the idea, it is somewhat like a co-op. Individuals subscribe by purchasing a “share” of a given farm’s (or group of farms) harvest for the year. Usually this is done before the start of the season, so you make a one-time payment, and then collect your shares weekly or monthly throughout the harvest season.

Traditionally the concept has been mostly done with vegetables. However, there are all kinds of CSAs cropping up these days, from vegetables & fruits, to dairy and even meats. Here in Ohio, where the growing season is not that long, I subscribe to a vegetable CSA in the summer, and a meat CSA (with one of the same farms) in the winter months, so at least I know I am eating locally in part throughout the year.

One of the farms I am subscribed to is organic. The other has mostly naturally grown produce, except for the fruit. One share I pick up at a local farmer’s market. The other is delivered right to my office!

Right now I am overwhelmed with the summer’s bounty. My refrigerator is filled to overflowing with amazing, fresh vegetables (and my freezer still contains some organic meats from the winter share). It’s been years since I lived on a farm, and with all the years of shopping at supermarkets and just picking up whatever I felt like, I had forgotten what a bounty the summer truly brings…. It makes me feel so much more connected to my environment to only be eating things that are in season. It also forces me to cook more creatively!

Right now, in my fridge I have turnips, turnip greens, sweet corn, green beans, red cabbage, white cabbage, red onions, white onions, tomatoes, cucumbers, green peppers, three kind of hot peppers, eggplant, summer squash, patty-pan squash, zucchini, broccoli, cantaloupe, and honeydew melon…and probably some other things I’m forgetting. And all of it is organic or naturally grown, and was picked within the last 2 days.

I feel truly blessed. And I am happy to feel like I am contributing to helping others as well — not just the farmers I have come to call friends, but those who use our limited resources and will inhabit our beautiful planet in the future.

I encourage you to look up a CSA in your area today, and see how easy (and delicious!) it is to start making a difference.

For more info on CSAs, as well as my favorite resource for finding local farms in your area, visit our website at http://www.newholisticliving.com/csa.html

Happy eating!
Enhanced by Zemanta