Continuing from Tuesday's post, here are some tips for planting your indoor seeds, thinning, watering, and getting them growing well in preparation for moving them outdoors later in the spring.
Planting Seeds:
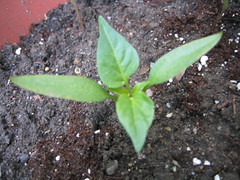
 Image via Wikipedia
After your heat-treated soil has cooled, fill planting containers firmly but do not pack. Allow about 3/4-inch from the soil surface to the rim of the container. Water well and let drain for several hours. Place seeds on the soil surface. Use a piece of window screen or old flour sifter to sift soil over the seeds to the depth indicated on the seed packet.
If you use compartmentalized trays or individual peat pots, place two or three seeds in each pot. Do not cover too deeply, as this may reduce or prevent seed germination. Just like planting directly in the ground, a general rule is to cover no more than four times the diameter of the seed.
Apply a fine spray of water to avoid washing the seed out, causing them to float to the soil surface. Household window sprayers are suitable.
Cover the containers with plastic sheets or panes of glass and place in a cool room (60 to 65 degrees) away from direct sunlight until germination. By doing this, you will almost eliminate the necessity of watering the bed again before the seeds germinate. Be sure to keep an eye on it though. DON'T let it completely dry out, and be sure to keep checking for seedlings, as they will need light once they appear.
Germination can take anywhere from a few days to a couple of months, depending on what you are growing, so patience will have to be one of your virtues.
When seeds germinate, move them gradually (over two or three days) into brighter light. When the seedlings have developed the first true leaves (the leaves above the cotyledons or “seed leaves”), thin to one plant per container if using partitioned trays or peat pots. Use tweezers to pinch off unwanted seedlings rather than pulling them, to avoid disturbing the remaining seedling.
If seeds were planted in larger containers, transplant into individual peat pots or other small containers. An alternative is to thin the seedlings so they are spread about 1 1/2 to 2 inches apart and leave them in the larger containers. This method, however, makes inefficient use of seed and space.
Water your seedlings carefully. Small containers used for starting plants dry out quickly. On the other hand, soil kept soaking wet inhibits seedling growth and may kill the plants.
 Seedling (Photo credit: arimoore)Moving Seedlings Outdoors:
About one week prior to planting-out time, gradually expose seedlings to longer periods outdoors unless temperatures are below 50 degrees. At the same time, reduce watering to a minimum as long as plants do not wilt. This will help the plants adjust to full exposure without undergoing undue shock at planting time.
When it comes time for planting in the ground, carefully remove the plant from its container, keeping the roots intact. Dig a small hole in the garden plot and place the plant into the hole. Cover up the roots completely nearly up to the bottom leaves of the plant. Pack down the soil around the plant and water. Watch your garden grow!
Seed Starting Supplies:


