Tuesday, May 25, 2010

8 Reasons to Garden Organically

I know there’s been a lot of fuss about organic gardening lately…. Have you ever wondered, what’s it all about? What makes it so special, and isn’t organic gardening difficult? So why should you garden organically?

We will explore this a bit today….
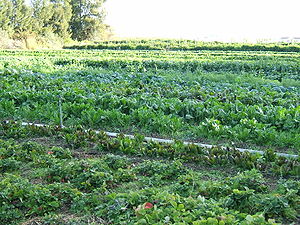
Organic cultivation of mixed vegetables in Cap...Image via WikipediaMagnificent gardens don’t have to be pumped up by means of chemical fertilizers and pesticides to look great or give you great produce.  Think about taking your garden to the next level – organic and sustainable. Organic gardening means growing vegetables and fruits through the use of things only found in nature.

So why would one want to indulge in organic and natural gardening?

1. The first, and most important motivation to garden organically, is a health issue.  Organically produced veggies aren’t passing along chemical residues that can build up within your body.  We aren’t sure of the future effects of many chemicals, but why risk it when there’s an organic and natural alternative?

2. Organic vegetables grown in organic soil may have a larger percentage of vitamins and nutrients. Reports have shown that there is elevated vitamin C in leafy greens, potatoes, and oranges that are raised organically.

3. Gardening organically means you work with the entire cycle.  You plant the seeds, harvest the vegetables or flowers, collect the seeds, compost the rest, and begin again.  You are providing the soil with nutrients and feeding people, birds, and insects, which gives you a more intimate and fulfilling relationship with the environment around you, and humanity as a whole.

4. You can cultivate your produce to full ripeness for ample flavor.  You can find dozens of seed catalogs with organic seeds that produce superb tasting produce.  You don’t need a tomato grown  to have a tough skin designed for transport across the country.  You’re looking for a tomato that tastes good!

5. Gardening organically can entail a smaller amount of effort in the long run.  If your soil is organic and healthy, it can produce strong plants which are more resistant to diseases and pests.  Hardier plants will grow larger and cast shade over their roots which means not as much watering.  Excellent soil will retain water better which also means less watering.  More vigorous plants may even help to stifle out the weeds so you do not have to spend your valuable time weeding.

6. Organic and sustainable farming brings about less damage to the environment. Chemical fertilizers, insect killers, and weed killers can seep into our ground water supply or run off into our rivers and streams.

But we can recycle garbage through the utilization of our own compost from food and garden scraps and other wastes including straw and leaves.

Reusing these items keeps them from being burned or added to a landfill where they don’t have a possible opportunity to decay and add useful nutrients back into the soil. (See my previous post on composting for a lot more detail on this!)

The gully was caused by rain water washing soi...Image via WikipediaAdditionally, organic farming practices help stop the loss of topsoil due to erosion. The Soil Conservation Service states that an estimated 30 – 32 billion tons of soil erodes from United States farmlands each year.

7. Gardening organically can even save you money! One does not need to pay money for high priced chemical fertilizers and pesticides with organic gardening. A lot of natural recipes for the control of pests and disease come right from the kitchen cupboard. Also at times other beneficial plants can be grown as companions for the main crop. One example of this is the marigold, which helps to repel aphids from vegetables.

8. Your cooking undertakings can get extra innovative and fun! For example, some flowers are suitable for eating when you raise them organically.  Add a unique touch to a salad presentation by adding nasturtiums or even brightly colored pansies.  Your prepared dish will look like it came from a gourmet restaurant! (To find other cool cooking ideas, just check out the cooking page on our website at: http://www.newholisticliving.com/cookingfromscratch.html.)

In sum, gardening without the usage of chemicals can give you more vigorous crops and save you wasted time.  More vigorous plants can mean tastier and healthier veggies that thrive with a smaller amount of water and also have fewer pest problems.  So give organic and natural gardening a try for tastier vegetables and feel great about helping yourself as well as the world!

Questions? Comments? Feel free to post below!
Rose.
Enhanced by Zemanta

Friday, May 21, 2010

All About Composting

Good morning!

Today we are finishing up our spring series on starting your own sustainable garden, with a special lesson on composting. We will cover how and why to compost, as well as dealing with common problems you may encounter when building your own compost.

Benefit of Composting
If you keep a garden, then you know how much organic “waste” you end up with by the time autumn rolls around. There are the little plants you’ve thinned out, the pruning of your pumpkin plants that ran amuck, and the remains of the plants themselves after your successful harvest. Then there are the grass clippings and tree prunings that really belong somewhere other than the garbage can.

Unfortunately, many people waste money and time having these materials transported to a landfill. And this isn’t just a waste of good compost; it’s a waste of everything that goes into the process of transporting it (the garbage man’s time, the money you pay for the removal, etc). It is truly a travesty, and one that can be easily avoided.

A handful of compostImage via WikipediaAll this garbage that people are trying to get rid of can be a better supplement for your garden than any fertilizer or chemical! If you properly facilitate the decomposition of all of the garbage, it will turn into highly beneficial nutrition for your plants. Therefore you can turn all the stuff you would have thrown out into top grade fertilizer for your garden.

It’s time to start composting all of your yard and garden waste as well as your kitchen scraps. Composting means the waste stays out of the landfills and provides you with an excellent source of “black gold” for very little money or effort on your part!

Building Your Compost
Usually compost is maintained in a pile somewhere in your backyard. For some, the thought of a compost heap brings disturbing images to mind, such as heaps of rotten garbage emitting a horrid odor. However, if you maintain your compost pile correctly, you’ll be able to produce great compost without producing an offensive odor (or really any odor at all).

You can build your own compost pile using a variety of different materials, such as wooden pallets tied together at the corners to form a square, as well boards, stakes and wire, or other materials. Or you can just throw everything in a big pile on the ground, if you have enough space! Just be aware that you will need to have a method to get air into the bottom layers of the pile, if you want it to compost quickly. This can be done by turning the pile by hand via shovel, or using an aeration tool to poke holes into it. (If using pallets, this can be easy, as you can poke holes in between the slats, all the way down the sides.)

However, if you live in an urban area, or don’t have much garden space, and a large compost pile is not really an option for you, you can still make great compost using a compost bin. There are many commercial varieties on the market and you don’t have to look any farther than your favorite garden store. Or make your own bin — one method is a plastic garbage can with holes drilled all over the sides and bottom for aeration and drainage.

Personally, I have had great success with a small compost tumbler. The  one I use is the Envirocyle Backyard Composter (I’ll try to post some pictures of my compost later this summer as it really gets going.)
In fact, this works so well, that even with a larger garden space, I can just maintain several of these throughout the season!

A pitchfork next to a compost bin.Image via WikipediaCompost Composition
A non-smelly compost is made up of three components; green, brown, and soil plus manure. Green refers to grass clippings, vegetable scraps from the kitchen, coffee grounds, crushed egg shells, tea bags, and other organic garbage and garden or yard refuse. The brown ingredients are dead leaves, small twigs and other small prunings, and you can also add newspaper or shredded brown paper bags (no more than a fifth of your pile should consist of paper, as it has a harder time composting with the rest of the materials). Don’t add meat scraps, bones, or other animal products, as these will attract wildlife and flies, and create bad odors.

It is usually pretty easy to find materials for your compost, but the challenge comes in getting it to compost.
The easiest way to compost is to just add roughly equal parts of the green, brown, and dirt plus manure. When you add additional items to the pile; like your banana peels, strawberry tops and potato peelings, throw some more leaves and dirt on top. This keeps it from smelling. You can just leave the pile pretty much to itself and you will eventually end up with compost. However, this easy method takes a while to turn the waste material into finished compost.

If you want to speed things up, make sure everything you put in your pile has been cut small or been shredded, especially leaves, paper, and straw. Turn your pile regularly with a pitch fork or shovel to speed things up. Doing this will increase the oxygen flow to each part of the pile, and oxygen is needed for decomposition to take place. Turning will also help with water penetration. Your pile should be damp and may require watering occasionally.

I would recommend that you have two compost bins going; one that’s almost done and the other that’s being currently added to. Otherwise, you won’t ever have a finished product. I have a small garden, so I keep a winter compost and a summer one. When I start my garden in the spring, the compost from the previous summer is well done and ready to add to my soil. Since not much composting happens during the winter in the cold climate where I live, I then use the winter compost to start off my summer batch, and add to it through the summer. This system functions well for my climate, but if you live somewhere warmer, you may be able to have multiple batches done each year.

You will know your compost is ready when it smells good (like dirt) and it’s a rich dark color. There should not be any clumps of partially decayed old vegetables in it.

It is truly amazing how all your scraps like grass clippings, carrot peelings, leaves, and green garden refuse can turn into nutrient-rich dark brown compost that’s perfect food for your plants! By starting your own compost, not only will you have a way to get rid of your waste in a sustainable way, you will be creating healthier soil and hopefully growing wonderful plants and vegetables.

To wrap up, here are a few quick “troubleshooting” tips for your compost:
Problem: Pile doesn’t seem to be decomposing
Solution: Your materials are either too dry, or you have too much “brown” material, and not enough green. Try adding some more fresh garbage or green materials, sprinkle with water, and turn. Things should start “cooking” within a few days. (Note: if the weather is cold, your compost will progress much more slowly, so if this is the case, just be patient, and it will go faster when things warm up.)
Problem: Pile is stinky, or attracting flies or other pests
Solution: Your materials are too wet, you have too much green material, and not enough brown, or you are adding inappropriate materials, such as meat scraps. Try adding some brown leaves or straw, or a bit of shredded newspaper, turn or tumble your compost, and don’t add any water for a few days. If it’s really smelly, you may also want to add a plain layer of brown materials on top and just leave it for a few days. Then turn and see if it’s better. Also using an enclosed compost tumbler or bin as suggested above can help prevent flies and other pests. My compost is pretty much never smelly, and rarely ever even has bugs around it.
Well, there you have it! I hope you have enjoyed the spring gardening series, and learned enough to get your own garden started. Of course, this is just the beginning of your garden adventure! We will add new posts throughout the summer on various matters relating to sustainable and organic gardening. We will also get into some more advanced issues, such as square-foot gardening, vermicomposting, hydroponics, natural pest control, and much more! Yay!  Be sure to check back to learn more….

See you then!
Rose.

P.S. If you would like to receive weekly tips and articles on sustainable gardening, be sure to check out our website, and subscribe to our free weekly Sustainable Gardening Newsletter! (It’s free, and you will only receive an email once a week, so we won’t over-run your inbox!)
Enhanced by Zemanta

Tuesday, May 18, 2010

Methods of Watering

Welcome back!

We are wrapping up our spring series on starting your own garden, and hopefully you’ve enjoyed it so far, and have learned enough to get your hands dirty!

Now, on to our last “official” lesson:

One of the most important things you will ever do for your garden is….water it!

Today we will discuss a couple of different watering techniques. Depending on your climate and location, some techniques may be appropriate in your area, and others may not. If you live somewhere where you have an abundant and constant supply of water for your garden, consider yourself lucky! But even so, overconsumption of water is always a concern to the dedicated sustainable gardener. However, there are some methods of watering which can be used sustainably, even in dry climates. Whether you live in an area that is going through a drought, or you just want to save water, I suggest you try some of these techniques.

Soil Optimization
If you’re looking for ways to keep your garden watered without wasting too much time and money, you’ve probably gone through a whole slew of options in your mind. Maybe you’ve considered a sprinkler, a hose, or a good old-fashioned watering can. All of these methods might be convenient, but a lot of the time you will end up wasting water on plants that don’t need it. And if you live in a drought struck area, you know that every bit of water counts.

A Garden hose.Image via WikipediaSome soil types retain water better than others. If you have hard soil (too much clay, for example), it can also be hard to get the water to soak in, meaning you may be forced to water more often than necessary in order to get it to actually absorb into the roots. If you have this problem, you can fix it by loading the soil up with lots of compost. This not only helps keep water from escaping, but encourages the plant’s roots to be healthy and able to survive more challenges.

Plant Placement & Rain Barrels
One thing you may want to try is to optimize your plant placement from the start, placing plants that require similar amounts of water in the same areas. That way you are not wasting water on plants that don’t need it, and you can also save time by just watering the sections that do.

You can also use rain barrels to collect and save rainwater. This is a sustainable and economical approach to watering your garden, and depending on your local rainfall and efficiency of your collection system, it can satisfy part or even all of your watering needs. (This is much easier than it sounds, and we will be covering this topic more in depth in a future blog, so keep your eye out for this!)

Drip Irrigation
The installation of a drip irrigation system is another option you can use to cut down the amount of water you’ll need to fully water your garden. One of the main advantages of the drip irrigation system is its efficiency. Instead of spraying large amounts of water everywhere like a hose does, it makes the most of your precious water by putting it exactly where it is needed. It can also provide your garden with a constant source of water, instead of just having your plants go thirsty whenever you’re not around to water them.

The great thing about these systems is that they constantly drip right into the roots of your plants, so that almost every single drop is absorbed. With traditional watering systems, often the roots get too overwhelmed with the sheer amount of water entering the soil. Thus, a lot of the incoming water just seeps right past, and is wasted. This problem is avoided with the drip system.

When you install a drip irrigation system, you can choose one of two varieties: (from author) "The principle behind drip ...Image via Wikipediaabove ground and under ground. The above ground method drips small amounts of water continuously onto the ground, and allows it to soak in. This is all regulated from a pressure controller, which ensures that the water just comes out at a drip instead of a spray or a stream. These pressure level regulators are very inexpensive. The whole drip system can be set up with a pressure regulator and a garden hose with holes poked in it (although it is ideal for you to get a pipe designed for this type of use, I’ve found that the hose method works acceptably). You can find a good drip/soaker hose recommended on our website.

The underground system is a bit more of a challenge to install and maintain. But if you’re really into the aesthetic aspect of your garden and don’t want any visible watering system, then you might consider it worth it. It’s essentially the same as the above ground version, only a small trench is dug for the hose or pipe prior to any planting. This allows the water direct access to the roots for the most efficiency. (Plus, you can impress your neighbors by having a beautiful garden without ever going outside to water it. They’ll be baffled!)

To choose between the two systems, you need to take several things into account. Do you have the same plant layout year round? If it is always changing, you probably won’t want to cover your hose. It can be quite a chore to dig it up and re-align it with all your new plants every year or so. Even if your plant layout never changes, you need to consider how much you actually mind seeing a hose in your garden. If it actually bothers you to the extent that you’re willing to work for a few hours to get rid of it, then by all means bury it. But otherwise I would suggest staying above ground if for nothing else than the convenience of repairing and rearranging.

So if you’re looking for an easy, cheap, convenient, and efficient alternative watering method, I would recommend purchasing the necessary items to install a drip irrigation system. I think you’ll be surprised at how much easier it is to grow a garden after you have it.

Drought-Resistant Plants
However, if you still seem to need more water than you can easily supply to your garden, or want to save even more water, you might consider which plants you could replace with less water-dependent plants. If you want a good shrub that doesn’t use up more than its share of water, look for something like Heavenly Bamboo. It is not only tolerant of droughts, but looks quite decorative in any garden. Also, tasty herbs such as rosemary are useful in preparing meals, and don’t require much water (in fact, rosemary grows very well all by itself, even in desert climates).

If you’re trying to find flowers that will still be lush and beautiful despite the lower amounts of water, look for penstemon varieties like Garnet, Apple Blossom, Moonbeam, and Midnight. You can attract hummingbirds and butterflies with varieties like Cosmos and Yarrow. Tulips also grow well without much water, and can be a vibrant and lovely accent to a spring garden or border!

The Lavender plant is another good choice. A large group of Lavender plants looks unbelievably gorgeous in your garden, and hardly requires any water to flourish. Pineapple sage, a 2-foot shrub that smells somewhat like pineapple, is another interesting option. It’s another major attractor of hummingbirds, and the leaves are also useful to add taste to tea and other drinks.

So if you are in the position of dealing with a drought and perhaps watering regulations, or even just wanting to conserve water and garden more sustainably, I suggest you try some of the things I’ve mentioned.

I hope this helps you with your garden planning (and planting). If you would like more tips and articles on sustainable gardening, be sure to check out our website, and subscribe to our free weekly Sustainable Gardening Newsletter!

And as promised, in our final post in this spring series, we will cover the all-important topic of composting, so stay tuned — even if you’re in a small apartment with just a patio garden, you, too can learn to make and benefit from your own compost! Be sure to keep your eye out for this.

‘Til then, ciao, and happy gardening!
Rose.
Enhanced by Zemanta

Friday, May 14, 2010

Tips On Planting Your New Garden

Good morning!

Today, we are going to get down to planting and organizing your garden, so grab your tools, and let’s get started!

Now you’ve picked out what type of garden you will have, where it will be located, and what plants you will be growing, you can really get started in creating your garden environment, and planting your seeds! (See previous post on choosing seeds.)  There are several items you will want to address in this process.

First, you’ll want to select what your garden barriers or borders will be. What will separate your garden from the rest of the world? Next you’ll want to select the types of support needed for your plants. Often some kind of mesh, stakes, or other supports are necessary to keep your plant upright. You will also want to plan how much soil and fertilizer to buy, and how to arrange all the plants in your garden.

Borders
Choosing a border can be a fairly important step in getting your garden started. While it might not actually affect the health of the plants, many people enjoy a garden that is aesthetically pleasing, as well as functional. Metal, wood, brick, or stone can be used as attractive edging and border materials — that choice is yours, depending on what you want your garden to look like.

Red tulip in my spring garden.
Supports
Finding something nice-looking to support your plants can be a little bit more challenging. Sometimes a short pole can work well, but often for larger and heavier plants, such as tomatoes, you will need a wire mesh for it to pull itself up on. You can find these at almost any gardening store, usually pre-shaped in a sort of conical shape well suited for plants. The plant will then grow up through it, and you can tie the branches to the cross spokes with twine if they need more support.

Buying Soil
If your soil is poor, you may want to buy some soil and/or compost to add in, but the goal should be to build up your own soil over time, so that it will be able to support a garden without adding too much from outside sources. (Some people try to solve the problem of poor soil by loading up their plants with every type of chemical and fertilizer known to man. This usually works to some degree, but to me it seems kind of unnatural to rely on man made materials to keep your plants alive. Also, as a sustainable gardener, and especially if I’m growing vegetables, I don’t feel very comfortable eating something that is full of chemicals!)

If you must add outside soil, try to find a source of organically certified soil, so you are not adding toxins to your new garden right off the bat. (Scott’s makes an organic topsoil mix, and for a good organic fertilizer, try Rainbow Grow Mix.)

We will cover making your own compost in a blog post coming up shortly, so be sure to check back!

Tulips along my garden fence.
Plant Placement
Arranging the plants can also be important to the success of your garden. I’m not talking about some kind of feng-shui thing, but depending on your watering, some plants might hog all the water and leave the other plants high and dry. Some plants have longer roots than others, and are more aggressive at seeking water. If you place one of these plants next to a plant with weaker, shorter roots, it will promptly hijack the water supply for itself, and can choke out the other plant.

Climate Considerations
Many gardeners live in areas where virtually anything can grow effortlessly. Just plant some seeds and water them for a few weeks, and you’ve got a beautifully lush garden. But if you live somewhere like Colorado, or other northerly climes, you’ll understand what its like to have a limited selection of plants that will grow naturally. It can be rather a challenge to facilitate the growth of a large variety of plants, especially when the very world you live in seems to be rooting against you.

This can be an important consideration, and one method that can work well in these situations is to create a “microclimate” for each type of plant. This is when you regulate the sunlight, shade, moisture, and wind factors for each separate plant. It sounds like a challenge, and it is. But you can regulate these factors in such a way that the plant feels just like it is in the ideal growing conditions. This can be achieved by the use of wind barriers, shading umbrellas, extra water, or different types or amounts of compost. This is fairly time consuming, but can be very rewarding if done right, and in some climates, it can be the best option.

I can’t explain every phase of this process, because everyone’s goals, climate, and setups are slightly different. But you can do research on every plant that you would like to have in your garden. Find out everything you can about the zone that it flourishes in, and ask yourself how you can emulate that zone within your own backyard. In most cases, you can take control of the environment and recreate whatever you wish. Ordinarily all it takes is some preparation and strategy. (If you try to find plants that will grow well in your area in the first place, though, that is the most sustainable option.)

In our next post, we will discuss watering techniques, and a couple of other important items, before wrapping up this series with a bonus lesson on that all-important topic — composting!

See you next time, and happy gardening!
Rose.

Tuesday, May 11, 2010

Choosing Seeds for Your Garden

Good evening!

We are continuing through your 2-week step-by-step guide to starting your own sustainable garden.

We are about get down to the nitty-gritty, and start planting…. But there’s one more thing I forgot — first we have to choose our seeds! Here are some tips to help with the process.

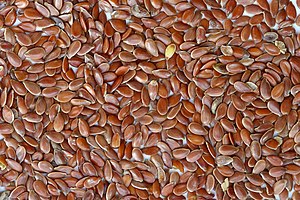
Brown Flax Seeds.Image via WikipediaChoosing Healthy Seeds
Choosing viable seeds can sometimes prove tricky. A seed may appear just fine to the eye, and yet not have within it the strength and vitality to produce a healthy plant.

If you save seed from your own plants you are able to choose the best yourself. So how do you figure out which seeds to preserve? When looking at growing plants for seed, it is not the blossom only which you must consider, but the entire plant. Why? Because a weak, scrawny plant may produce one fine blossom. Looking at that one beautiful blossom, you may think ahead to the numberless equally lovely plants you are going to have from the seeds. But just as likely as not the seeds will produce plants like the parent plant.

So in seed selection the entire plant should be considered. Is it sturdy, strong, well shaped and symmetrical? Does it have a goodly number of fine blossoms (or fruits)? These are questions to ask in seed selection. (I learned this the hard way last year, when I saved seeds from some gorgeous morning glories blossoms, which were growing on a straggly, weak-looking plant. My new seedlings this year are also turning out straggly & weak so far…. Hopefully they’ll perk up soon!)

Size is also another point to hold in mind. If you purchase seeds, you have no way of knowing anything about the plants from which these seeds came — all you have to judge from are the seeds themselves. If sizes vary, by all means choose the largest and fullest seed.

The reason for this is that a new plant must depend for its early growth on the nourishment stored up in the seed. And so if we choose a large seed, we have chosen a greater amount of food for the young seedling. The seedling feeds upon this stored food until its roots are ready to do their work. So if the seed is small and thin, and the first food supply insufficient, there is a possibility of losing the little plant.

The third thing to look out for in seed is viability. Some seeds which look to beSunflower seedlings, just three days after ger...Image via Wikipedia all right may not develop at all, for various reasons. Seeds may have been picked before they were ripe or mature; they may have been frozen; and they may be too old. Seeds retain their viability or germ development power for a given number of years and are then useless. There is a viability limit in years which differs for different types of seeds.

If buying seeds, check the packets for expiration dates. If you are saving your own seed, in most cases it will be best to throw out unused seed after 2-3 years, and always be sure to stash your seeds in a cool, dry place!

Okay, ready to plant? Good! In our next lesson, we will get down to planting, so hopefully you’ve got your tools ready! (If you need help finding good garden tools, there are some suggestions here: http://www.newholisticliving.com/sustainablegardening.html )
Rose.
Enhanced by Zemanta

Monday, May 3, 2010

Choosing the Best Plants for Your Garden

Good morning!

I hope you are enjoying the sustainable gardening series so far. We have a lot more great topics to cover, but today we are going to talk about how to choose the right (and healthiest) plants for your new garden.

Choosing the Right Plants for Your Garden
Pink hyacinth from my garden.

Many times we purchase plants on impulse then find there is nowhere in the garden that really suits them. Before buying plants, you should carefully examine your garden to see how much sun and shade it gets (more on this in the next newsletter!), whether the soil is well drained or waterlogged and whether your aspect is sheltered or windswept. You’ll then be better equipped to go and buy the best plants for your situation: shade-loving plants for the sheltered areas, sun-lovers for the warm spots, drought-resistant plants for the parched areas which may be either sunny or shaded, and swamp plants for the poorly-drained parts.

But first, it’s a good idea to test your soil, to determine the pH level of your soil and what kind of nutrients you need to add, if any. Is the soil acid or alkaline? Most plants prefer soil that is slightly acidic, but there are some that must have alkaline soil to grow. You can alter the soil’s pH level, but it’s much easier to simply plant for the soil you have. (Keep your eye out for more on soil preparation in a future issue!)

Now you are ready to plant. Well – almost…. Will you plant in groups or singly? If you buy ‘one of everything’ your garden may seem rather spotty. Group plantings are organized, harmonious and you can vary the flower or foliage color for visual interest.

Picking Healthy Plants
When it comes to getting started with your garden, you have two choices; planting seeds, or buying whole plants. Both have their own benefits. If you plant seeds and care for them every day, you will find it is a much more rewarding experience when you have a full, healthy plant. However, this method is a lot more risky. I can’t tell you how many seeds I’ve planted and never seen any trace of whatsoever, or else the seedlings germinate, but don’t grow very strong or very quickly.

If you choose to buy the plant from a nursery and install it in your garden, it reduces a lot of the work involved in making it healthy. However, I have found in the past that many incompetent nursery workers will absolutely ruin the health of the plant by putting certain chemicals or fertilizers in. I have adapted to this incompetence by learning to choose the healthiest plant of the bunch. Here I will discuss some of the techniques I use in my screening process for plants.

It may sound superficial, but the one thing you need to check for on your prospective plants is how nice they look. As far as plants go, you can truly judge a book by its cover. If a plant has been treated healthily and has no diseases or pests, you can almost always tell by how nice it looks. If a plant has grown up in improper soil, or has harmful bugs living in it, you can tell from the holey or yellowed leaves and wilted stems.

If you’re browsing the nursery shelves looking for your dream plant, you want to exclude anything that currently has flowers. Plants are less traumatized by the transplant if they do not presently have any flowers. It’s best to find ones that just consist of buds. However if all you have to choose from are flowering plants, then you should do the unthinkable and lop off all of the blooms. It will be worth it for the future health of the plant. I’ve found that transplanting a plant while it is blooming results in having a dead plant seventy to ninety percent of the time.

Always check the roots before you plop down the money to purchase the plant. Of course if the roots are in absolutely awful condition you will be able to tell by looking at the rest of the plant. But if the roots are just slightly out of shape, then you probably won’t be able to tell just by looking at it. Inspect the roots very closely for any signs of brownness, rottenness, or softness. The roots should always be a firm, perfectly well formed infrastructure that holds all the soil together. One can easily tell if the roots are before or past their prime, depending on the root to soil ratio. If there are a ridiculous amount of roots with little soil, or a bunch of soil with few roots, you should not buy that plant.

If you find any abnormalities with the plant, whether it be the shape of the roots or any irregular features with the leaves, you should ask the nursery employees. While normally these things can be the sign of an unhealthy plant, occasionally there will be a logical answer for it. Always give the nursery a chance before writing them off as horrendous. After all, they are (usually) professionals who have been dealing with plants for years.
So if you decide to take the easy route and get a plant from a nursery, you just have to remember that the health of the plants has been left up to someone you don’t know. Usually they do a good job, but you should always check for yourself. Also take every precaution you can to avoid transplant shock in the plant (when it has trouble adjusting to its new location, and thus has health problems in the future). Usually the process goes smoothly, but you can never be too sure.

Also, before transplanting your new plants outside, place your chosen plants around the garden bed in their pots to see how they will look. Re-arrange them until you are satisfied.

When planting flowers, grouping plants in sets of threes or fives usually looks better than planting in groups of even numbers. Be sure that you have an interesting combination of colors and textures. Tall plants should go to the back, or the center if your garden will be viewed evenly from all sides.

Spring flowers in my garden.
The right color pallette is one way to maintain the harmony in your garden. Imagine the color of the flowers when they are in bloom. Some colors may conflict with others, but can still be planted side-by-side if they have a different blooming season. Foliage color is also important. Many flower plants have silver, grey or purplish foliage that is just as attractive as the flower. This means that they are still attractive well past the blooming season and so have added value.

Try to keep your plants away from trees. The roots of trees are ferociously competitive and will steal all the nutrients and moisture meant for your garden.

Hopefully this will help in choosing the right plants to put in your new garden, and making sure you get the healthy ones, if you purchase them pre-started.

Stay tuned for our next blog, when we will get into the real nitty-gritty, and start talking about planting!
See you then!
Rose.

P.S. I hope you enjoy the pictures — they are from my garden this spring!