Tuesday, February 28, 2012

Getting Started With Gardening - Part 1

The thing to remember when starting a garden for the first time is to start small.  A small plant bed, about 25 or 30 feet square is perfect, is just enough room for about 30 plants.  This will give you a chance to try out your green thumb and if you find that you enjoy your garden you can always expand and increase your plantings.

A soil water conservation method used in a far...Image via WikipediaThe next thing you will want to do is choose a site. Gardening must be done in an area that gets at least six hours of sunlight.  Try and stay away from large trees that will take your plants water and nutrients, and at least three feet from any fences or buildings.  In hot climates it is a good idea to choose a place that will have shade from a part of the intense late afternoon sun.  It is possible to have a healthy garden with even ten to twelve hours of sunlight, but the type of plants must be adaptable.  While soil can always be improved, a site with good soil is a plus.  Avoid areas that have rocky soil, steep slopes, or areas where water stands.

Now comes the fun part: start digging.  Gardening is not a clean hobby; you’re going to have to get some dirt under your nails.  First remove the rocks, debris, and any grass and weeds then dig the spot up about one foot deep.  Level up the dirt and add compost or minerals if the needed.  If your soil is too acidic, add lime; if it is too sandy, add peat moss.  Plants will thrive in neutral to acidic soil with a little added fertilizer.

Be sure to check back Thursday for more beginner gardening tips on choosing plants (or seeds), planting, watering, and taking care of your new garden!

Enhanced by Zemanta

Saturday, February 25, 2012

Video - Indoor Window Gardening Tips

Here is a short video with some helpful tips for indoor gardening, or planting a small window garden. From proper light conditions and sunlight exposure, to how to keep your garden from damaging your windowsills, this quick video shows some ways to establish your own little window garden easily - and even a bit of greenery is much appreciated at this time of year!

Gardening Tips : How to Make Indoor Window Gardens
Creating an indoor window garden requires a window, some sunlight and moisture. Make a windowsill garden with expert tips from a gardener in this free video on creating an indoor window garden. Expert: Yolanda Vanveen Contact: www.vanveenbulbs.com Bi...


Indoor Window Gardening Resources:
   

Thursday, February 23, 2012

Indoor Gardening - Keeping Pets Out of Your Plants

Cats and dogs love dirt, they dig in it, play in it and if a cat’s litter box isn’t clean they may find a back-up location in your potted plants. (Yuck!) Some pets will leave the dirt alone but are irresistibly drawn to the leaves, either to nibble on or bat at.  There is no fail-safe plant but there are some tips and tricks you can follow to make your pets leave the plants alone.

English: Female grey tabby and white cat resti...Image via WikipediaThe biggest problem and the most damaging to an indoor plant is a cat deciding to use the dirt as a litter box.  Once a cat has done this once, the odor is there and it is going to be hard to stop them from going back.  To prevent this from happening in the first place, cover the dirt in larger pots with lava rock or wood chips.  A cat will not like the feel of either of these materials on their paws and will not feel comfortable using the pot as a potty.

Dogs are easier to train and keep away from plants but it is harder for other animals.  Especially for cats - a deterrent may be necessary to keep them away.  You can use a spray bottle of water to stop them from chewing on plant leaves or digging in the dirt.  Since cats don’t like anything from the citrus family you can put fresh citrus rinds at the base of the plant too – their sensitive noses will stop them from getting too close.

Keep your soil nice and moist, not only is this good for the plant, cats will not enjoy digging in wet dirt.  Some trial and error may be called for until you find the right solution that works for your pets.  If all else fails, buy hanging plants instead or put the plants in an inaccessible location.
Enhanced by Zemanta

Tuesday, February 21, 2012

Flowering Plants – Getting them to Blossom Indoors

You may have heard that it is hard to get shrubs or trees to blossom indoors. That’s because the right conditions are essential.  But if you have the patience and the correct amount of light you can be successful.  In addition to having the right conditions, you will also need to choose flowering plants that have a history of blooming in indoor gardens.

Camellia sasanquaImage via WikipediaIf you purchase a flowering plant or tree at a greenhouse, be aware that the plant will be acclimatized to the optimal conditions found there.  You may have better luck purchasing at a nursery or bringing an outdoor plant indoors – they will be hardier and used to changes in weather.  Look into your garden center’s return policy too - many will guarantee the life of your new plant for a certain period of time.  They will also give you important information on the care and maintenance your flowering plant will need.

Humidity is important too; you can purchase a humidifier to help or you can simply place a tray of water close to the plants and as it evaporates it will create more moisture in the air.

Some of the best plants to buy that have been proven to easily flower indoors are:
*    Camellias
*    Azaleas
*    Crimson Bottle Brush
*    Gardenias
*    Zebra Plant

Keep the soil moist, fertilize well approximately twice per year and provide plenty of direct, bright light, and you are likely to see blossoms on your trees or shrubs.  Also be careful with open windows - if you do not have screens, bees and other pollinating insects may find their way inside your home. However, although they aren’t always the best house guests but if they show themselves back out they are great for the flowers.

Enhanced by Zemanta

Saturday, February 18, 2012

Video - Helpful Composting Tips

Here is a video review of a few helpful organic gardening tips for getting your compost up and running well. As you can see, she has a lovely large pile that is getting going here, and she shares some ideas that you may find useful for building your own. And you can find some of the helpful composting tools she mentions listed below the video.

Composting : Garden Composting Tips
Composting requires you to take a few important things, like size and temperature, into consideration. Learn about garden composting tips with help from the operator of a small, organic nursery in this free video clip. Expert: Ali Reynolds Contact: O...


Helpful Composting Tools:
   
Enhanced by Zemanta

Thursday, February 16, 2012

Dynamic Composting Tips and Tricks

If you're wanting to have a successful compost, here are some helpful tried and tested tips that can help you keep your compost dynamic and growing, and avoid common composting problems:

English: Composting in the Escuela Barreales.Image via Wikipedia1. Balance the ingredients

Primarily, the basic thing you need to keep a compost heap active is the proper balance of ingredients. If you have too much of a single component, your compost may eventually die down. Remember that a compost is inherently comprised of numerous types of organic matter, and to keep it in top condition means that you must also maintain the variety of materials you put in your compost heap.

Over time, some ingredients in the compost heap may dominate the others, so make it a point to replenish your compost bin and have it checked frequently.

2. Select the right bin or container

If you choose your materials well but put them in an unsuitable container, the compost will become passive over time. Find the right fit for your compost heap and then ensure that the container itself is well-maintained, and has enough air flow, enough moisture, and other components mentioned here.

3. Dampen but don't soak

Soaking is one thing that will hinder your compost. It will either make it smelly, or drown the heat and stop the composting process (or both). The composting materials should be damp to the touch, but not so much that you can wring water out of them. Think of a damp sponge that has already been well-wrung out - that's the moisture level you want.

A homeowner sifts soil made from his compost b...Image via Wikipedia4. Bacteria need air

Aeration is the complementary partner of ample moisture in your compost heap. If you provide your compost heap with enough air, the bacteria that produces humus will thrive and will help exceed your expectations of compost heap performance. So be sure your compost heap is well aerated, but at the same time don't let it dry out (see Tip #3 above).

5. Check the temperature

There is an ideal temperature for composting. Try to ensure that the compost heap maintains this temperature - otherwise the whole reaction for composting will not be sustained or completed. It helps to have a thermometer handy when you inspect your compost heap's progress. If possible, find a thermometer that is created for composting purposes. (See examples here.)

6. Have a designated area for composting

It is not recommended to have a mobile composting heap. If you can start and keep it in a single place as it grows, it will increase its chances of thriving. When you move around your composting heap too much, less reaction takes place.

By following these tips, you can help ensure that your compost will stay dynamic and growing, and produce the best enhancement for your garden soil in the shortest amount of time.
Enhanced by Zemanta

Tuesday, February 14, 2012

Seed Diversity - Shocking Image

We posted a few articles on here recently about the importance of choosing open-pollinated or Heirloom seeds for sustainable gardening, but few realize the scope of the problem we are facing. This photo offers a shocking view of just how much diversity we have lost in terms of seed varieties - and this is just up until 1983 - imagine how far we've "come" since then!

Save your seeds, share your seeds, and preserve heritage and heirloom varieties where you can find them - or our children may have even fewer choices left than we do....


Pretty scary stuff, huh?!

For our previous posts on this topic from last month, see http://nhlsustainablegardening.blogspot.com/2012/01/video-hybrid-vs-open-pollinated-seeds.html and http://nhlsustainablegardening.blogspot.com/2012/01/planning-your-sustainable-garden-grab.html.
Enhanced by Zemanta

Saturday, February 11, 2012

Video - Building Greenhouses From Recycled Materials

This one isn't so much an instructional video, but it does show a couple of really neat little greenhouses constructed by hand from recycled materials. I really like the idea of the old tires filled with dirt for holding the heat - I had heard of using water barrels, but this technique was new to me - and gives you a great and functional way to hide those old unsightly tires at the same time. Anyway, there are a couple of other cool ideas here that you may want to incorporate into your own greenhouse, so check it out!

How To Build A Greenhouse From Recycled Materials
Learn how an eastern New Mexico gardener constructed a greenhouse from recycled materials. From the Southwest Yard & Garden series.


More Helpful Resources for Building Your Own Greenhouse:
   

Enhanced by Zemanta

Thursday, February 9, 2012

Building An Easy And Cost-effective Greenhouse In Your Back Yard

If you want to garden year-round, a greenhouse is a great idea, and doesn't need to be an overly expensive or time-consuming project. However, thorough planning and preparation is essential before starting your greenhouse project. Your greenhouse design will very much depend on your home’s architecture, space and plants that you want to grow, cost and available location. Make sure that your greenhouse will provide an environment suitable for your chosen type of plants.

Location:

Your greenhouse must be built in a site where it will get full and concentrated sunlight - especially during the winter, if you are going to garden year-round.

Your best option is the “southeast side” of your house. All day sunlight is best, though also consider the morning sunlight coming from the east side because this is adequate for some plants. A location on the east side captures most of the November up to February sunshine.

Deciduous trees like oak and maple can shade the greenhouse effectively from the strong late afternoon sun during the summer but they must not shade or cover your greenhouse during the morning. These trees likewise permit maximum sun exposure during the winter due to the shedding of their foliage during fall.

Your greenhouse must not be located beside trees having leaves all year as it will block the winter sun. You must maximize greenhouse exposure to winter sun especially if your greenhouse will be used year-round.

Drainage:

Another necessity for the location of your greenhouse is good drainage.  When needed, construct your greenhouse slightly higher than the surrounding ground so as irrigation and rainwater will easily drain away.

The amount of light that is required by the types of plants that you will grow, water, heat and protection from strong wind are other factors that should also be considered.

Also, you need to set up a workplace and an area for storage of your supplies in your greenhouse.

Here are basic instructions for a simple and easy to construct greenhouse:

Materials:
  • 5 pieces of 20 foot each “of 5/8 inch” rebar, cut into 1/3's - 6 foot in length.
  • 7 pieces of 20 foot schedule” 40 PVC” drilled with a hole size 3/16 to ¼ inch “dead center” at 10 feet.
  • 84 feet that is “cut into 4 foot lengths” of “½ schedule 40 PVC”
  • 80 pieces size 2X4 wood (treated).
  • 4 pieces fence posts, 8 foot in length (treated).
  • Size “40X24 fee” UV “polyethylene”, stabilized
  • 60 pieces 2 ½ inches fence staples
1. Begin by extending a thin rope or string where the “two long sides” of your greenhouse should be. Then pound the 6 foot rebar in, each with a distance of 4 feet away from each other, in a “straight line” and allowing 48 inches to protrude from the soil or ground.

2. Nail the 2X6 runner on to the “rebar stakes”. This will provide you with something so as to nail on the polyethylene later. You may use a “60 2 ½ inch fence staples”.

3. Slide in the PVC pieces (20 inch) over the “rebar stakes”, making certain that no sharp points are exposed, such as rebar, wire ends, rough pipes, etc.

4. Put the PVC pieces (20 foot) on the “rebar stakes”. You need to have somebody do “one side” as you also do the “other side” carefully and slightly at each time.  Make sure that you drilled holes “parallel to the ground”.

5.  Slide the wire all through the PVC holes and through the 8 PVC (4foot) pieces “along the roof”.

6. So as the “ribs” will not shift horizontally, you need to wire together the 4 foot PVC pipe lengths with either baling or copper wire.  Make certain that the wire is wrapped so that the PVC pipe is forced inward.

7. Construct now the “two end walls” and the doors. Use vertical posts (4X4) 10 foot length and buried 3 or 4 feet for the doorway frame.  Make certain that the end walls are not floppy and must stay vertically so that the PVC will not separate.  Your door must be very tight so that the wind will not be able to inflate the greenhouse.

8.  Drive some nails into the post’s base horizontally of the posts and submerge them to the ground.

9. With somebody’s help, and one person on each side holding the plastic, slide it over the rib cage and then attach the ends by wrapping the plastic’s end around lath pieces then “nail the lath” to the “end walls” and also along the foundation.

10.  Be creative and add a few of your personal touches.

All done! Have fun in your greenhouse!

If you prefer to purchase a greenhouse kit with all pieces included and detailed instructions, there are many of these on the market today as well - in all different sizes and price ranges. Here are some examples:

12' Compact Plus 9.9 Model Greenhouse Kit - Frame: Green

Juliana Greenhouses 7' Basic 450 Greenhouse Kit


Palram HG8012 Snap and Grow 8 ft. x 12 ft. Greenhouse

Poly-Tex Snap & Grow Silver 6 Foot Greenhouse


Enhanced by Zemanta

Tuesday, February 7, 2012

Building A Window Greenhouse

Instead of looking out through your glass panes and sadly watching your not-so-long-ago attractive flower beds that are now frozen in the winter, you can easily transform your window into a little greenhouse where houseplants, herbs, seedlings and flowers will thrive.

A window greenhouse is also a great project for plant lovers with limited space.  Also referred to as a window garden, even with its very small structure, this little garden can often supply you with enough space so that you can enjoy year-round blossoms. It's also a great place to start seedlings to transplant outside for your summer garden.

Greenhouse Plants
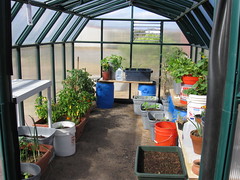
Greenhouse Plants (Photo credit: azmichelle)Cost, materials and your window greenhouse size are factors to be considered when deciding the style that best suits you.  Just do keep in mind that the style should match the design of your home.

There are complete kits now available for bay window style units that are energy saving and install easily. They certainly will open up any room and likewise increase the functionality of a living space. A window greenhouse seat may also be utilized as a pretty breakfast nook or a place for indoor plants that would take up a lot of floor space.

The bow greenhouse window can also be a great option. These are composed of more than four glass segments to imitate a rounded look.  Bay greenhouse windows generally come in three segments with sides that are angled at either thirty or forty-five degrees.

Your most cost-effective and simple to build option will be a complete greenhouse bow window kit as compared to building a new window greenhouse yourself.   With the kit, all you have to do is remove your existing window then enlarge the opening of the wall in accordance to the required size stipulated in the kit and just screw and nail your greenhouse window in place.

However, you should first select a size or measurement that suits your interest as well as the plants that you will be housing.  More plants will mean more time to attend to them. Starting with a smaller greenhouse window unit can be a good idea, as you can just install another one. However if your goal is to have more open space then start bigger.

Bow greenhouse windows that come in vinyl maintenance-free material or aluminum coated wood are very appealing. The interior is natural wood which can be stained or painted. With the imitation wood graining, often the stained or painted vinyl looks very real and is also maintenance-free.

Your choices when it comes to window greenhouse features are endless. For energy saving, select a bow greenhouse window structure with bendable foam insulation that is constructed into the seat board or headboard. Some really efficient kinds have foam-stuffed cavities and frames.

The glass paneling is considered to be the core of any greenhouse window for glare control, comfort, efficiency and resistance to fading.  For most temperatures and weather, low-emissive or “low-e” type of glass having argon gas between gaps is not a good choice. Select a glass with an insulating spacer.
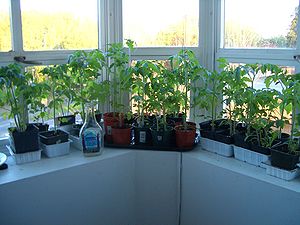
English: Tomato seedlings (a number of tomato ...Image via WikipediaExamine your home and look for the windows that have the qualities needed for a window greenhouse.  You need warmth, good light supply and easy water access. Maintaining and growing plants indoors requires that you provide humidity, sunlight and reasonably constant temperature.

Keep in mind that you will be working with the plants in various ways such as transplanting them when needed, watering, fertilizing and checking for disease, so you need an area of the house that is easily accessible to you, that will not clash with other activities in the home.

When you want and enjoy the sight of colorful flowers where you spend a lot of time, for instance, in the kitchen, it does not have to follow that you should have your window greenhouse in the kitchen, if there is limited space; you can rotate flowering plants to many parts of the house, and just return them regularly to the window greenhouse for some rest and sunshine.

Once you have decided where to put your window greenhouse, decide whether you will be building it yourself or you will purchase a kit. 

To fill your new greenhouse, you may purchase potted flowering plants in bloom and arrange them in your window greenhouse.  During fall, you can transplant summer flowers into pots so that you can enjoy when winter comes. And herbs are always an attractive, useful and fragrant addition to your window greenhouse. With a window greenhouse, you can have a mini-garden all year long and enjoy it no matter what the weather brings.

Window Greenhouse Resources:
   

Enhanced by Zemanta

Saturday, February 4, 2012

Video - Indoor Gardening With the AeroGarden

If you haven't heard of an aero garden, it is a method of gardening using a unique nutrient delivery system combined with special grow lights, which offers enhanced growth with less fuss and muss than a traditional indoor garden using soil. Keep in mind that in most cases aerogardening is NOT organic, as it does use some chemically enhanced sprouting and growth solutions. However, you may be able to substitute some organic fertilizers instead and get similar results.

If you are interested in indoor gardening, you can learn more about the AeroGardening system here:

AeroGarden YouTube
The AeroGarden is the world's first indoor gardening appliance. Grow fresh herbs, produce, salad greens, flowers and more indoors, with no dirt, weeds or mess.


The AeroGarden System:
   
Enhanced by Zemanta

Thursday, February 2, 2012

Safety Considerations for Indoor Gardening

It is most likely that your indoor plants will be safe from harm other than the odd garden pest.  But if you have young children or pets in the home, some plants can pose a danger to them. There are many plants that are not recommended for indoors (or outdoors for that matter) when children or pets are present.  Some plants are poisonous, even fatal, if ingested.

Listed below are a few of the more dangerous plants that aren’t safe to have around if you have kids or indoor pets:

Ricinus communis English: Photographed and upl...Image via WikipediaThe seeds of Rosary Pea and Castor Bean plants are lethal.  Fatalities have been reported from the ingestion of just one seed.  If a young child or cat chews on one of the leaves they are sure to get sick.  You may occasionally necklaces that are made from the seeds of this plant.  Be aware that these are not meant for children and can also cause skin irritations in adults.

Parts of the Oleander plant (the leaves and bark) are also poisonous.  It is not worth the risk to have these in the house.  Even with due diligence children or pets are bound to get into a houseplant at one point or another.  It is hard to safeguard against falling leaves or other unavoidable events.

English: Hyacinth (plant)Image via WikipediaThe bulbs of certain flowering plants are considered poisonous too.  Even if you are planning on planting the bulbs outside, be careful they are stored in a safe out of the way area that is not accessible to little heads.  The flower bulbs in question are from the Hyacinth, the Daffodil and the Narcissus flowers.

If you own any of these plants and don’t have little animals or children running around to get into them, still use caution.  Be aware of what plants in your house are potential hazards to humans.  In addition, be a considerate host or hostess and put the dangerous plants in a safe out of the way place when young visitors are coming over.

Enhanced by Zemanta